출처 : 변성윤님 블로그.
출처 : 부스트캠프 AI Tech.
1. Voila
1.1 Why Voila? - 프로토타입이 중요한 이유
- 모델 개발 과정
- Jupyter Notebook에서 함수를 작성한 후, 예측 함수를 실행하며 성능 확인
- 혼자 확인할 땐 위와 같이 진행해도 괜찮으나, 동료들과 함께 보면서 이야기할 때는?
- 라이브러리의 의존성
- 테스트를 위해 추가 환경 설정이 필요
- 개발을 잘 모르는 분에게 테스트 요청할 경우엔 이 부분을 어려워 할 수 있음
- 이런 경우 활용할 수 있는 도구가 Voila
- Notebook 베이스로 프로토타입 만들기
- ipywidget과 같이 사용할 경우 간단한 대시보드를 구축할 수도 있음
- 실행할 때 저장된 Notebook 파일이 순차적으로 실행
1.2 Voila
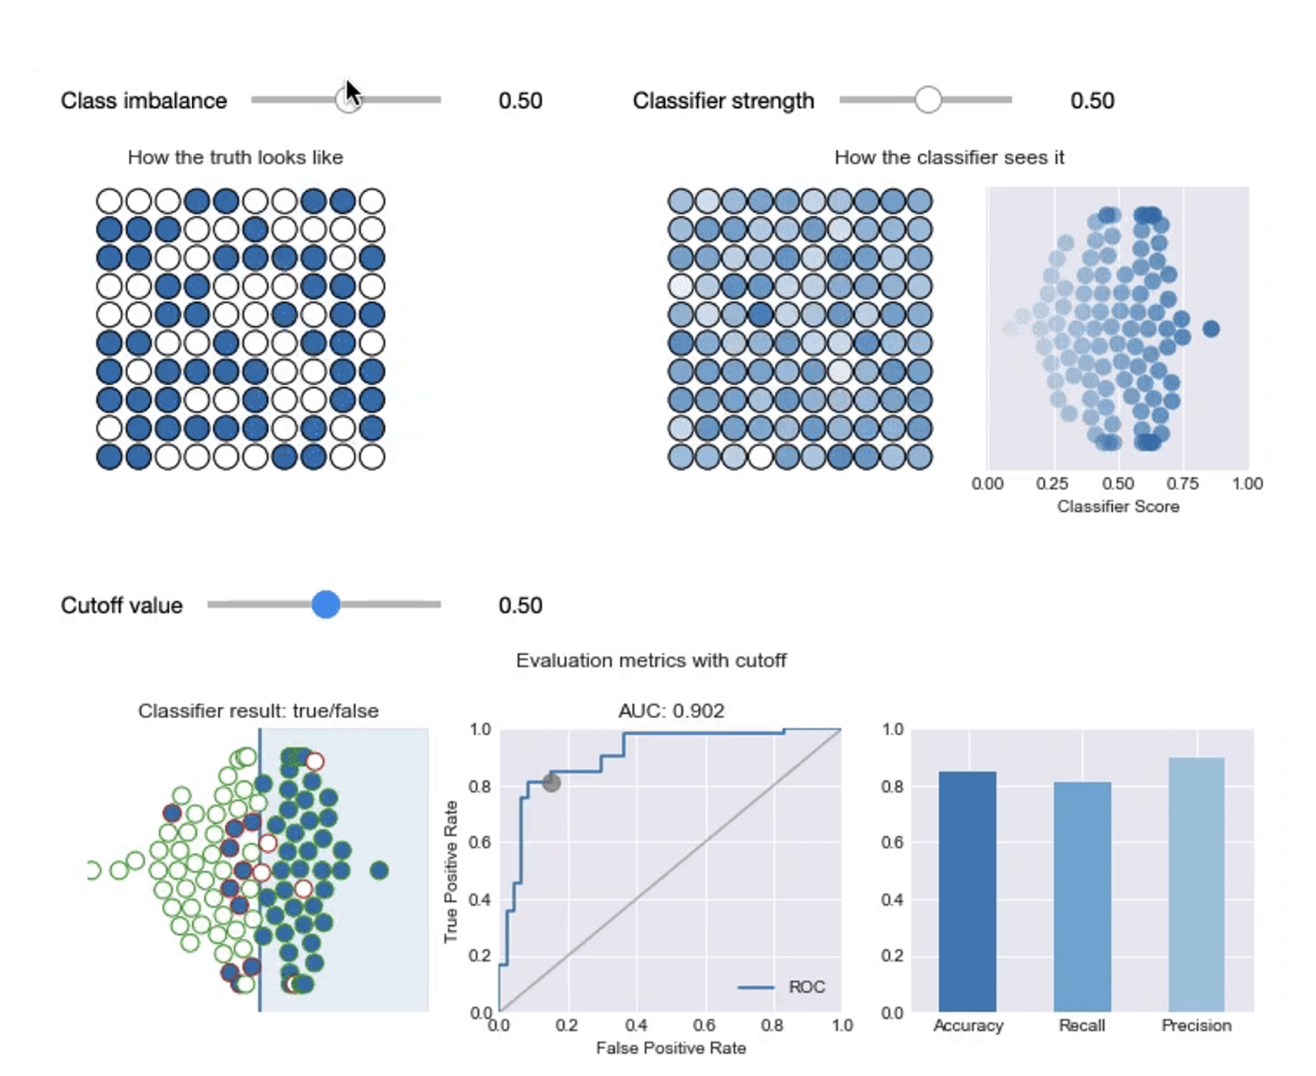
- Voila의 본래 목적 : 대시보드
- R의 Shiny와 유사하며, 파이썬의 Dash와 유사한 도구
- (참고) Dash는 Dash의 문법을 익혀야 하기 때문에 사용할 때 시간이 필요함
- 대시보드는 다양한 도구들이 존재함. Superset, Metabase, Redash, Tableau
- 다만 위 도구는 모두 서버에 제품을 설치한 후, 연동시켜야 함 (=개발 리소스 필요, 유지보수 필요)
- 대부분 SQL 베이스의 시각화
- Notebook에서 별도의 코드 추가 없이 실행할 수 있는 점이 Voila의 강점
- 노트북 파일만 만들면 프로토타입은 쉽게 만들 수 있음
- 2019년 12월에 Jupyter의 하위 프로젝트로 통합됨
1.3 Voila 의 장점
1) Jupyter Notebook 결과를 쉽게 웹 형태로 띄울 수 있음
2) Ipywidget, Ipyleaflet 등 사용 가능
3) Jupyter Notebook의 Extension 있음(=노트북에서 바로 대시보드로 변환 가능)
4) Python, Julia, C++ 코드 지원
5) 고유한 템플릿 생성 가능
6) 너무 쉬운 러닝커브
1.4 Voila 사용방법
1.4.1 Voila 설치
$ pip3 install voila

# JupyterLab 사용한다면
$ jupyter labextension install @jupyter-voila/jupyterlab-preview

# jupyter Notebook이나 Jupyter Server를 사용한다면
$ jupyter serverextension enable voila --sys-prefix

# nbextension도 사용 가능하도록 하고 싶다면 다음과 같이 설정
$ voila --enable_nbextensions=True
$ jupyter notebook --VoilaConfiguration.enable_nbextensions=True
1.4.2 Voila 사용
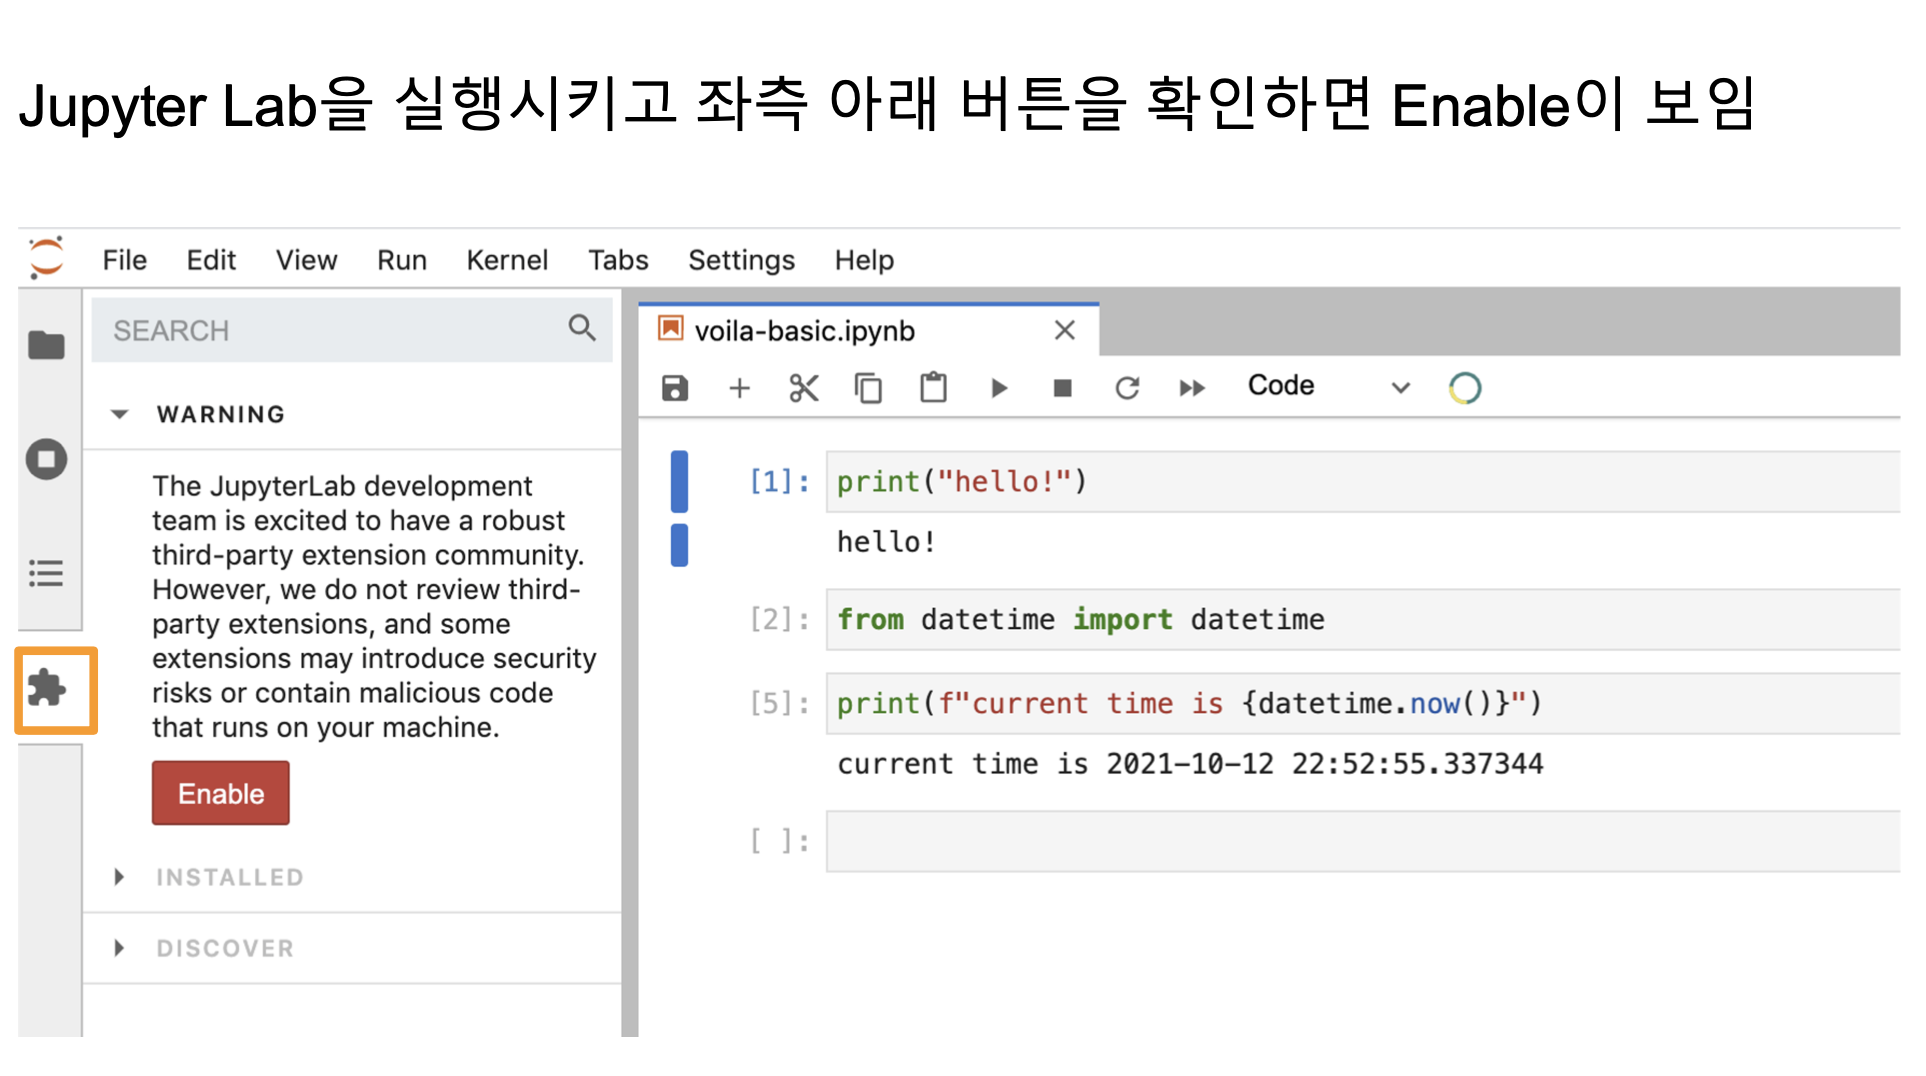
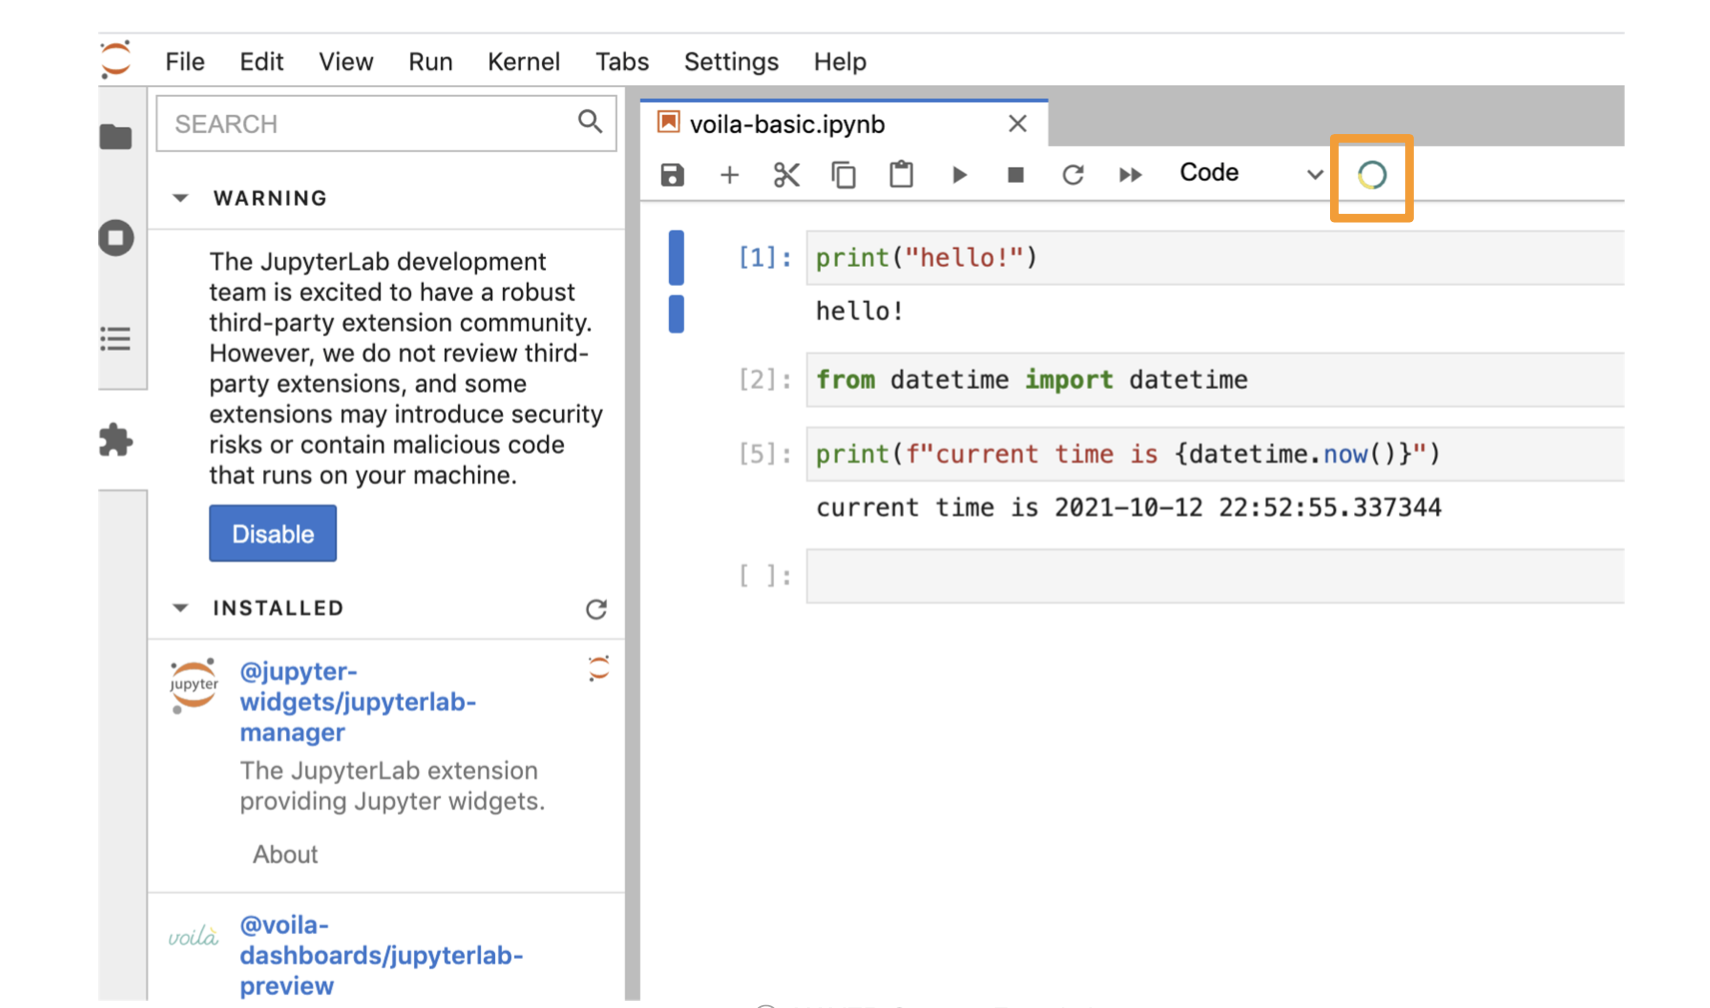
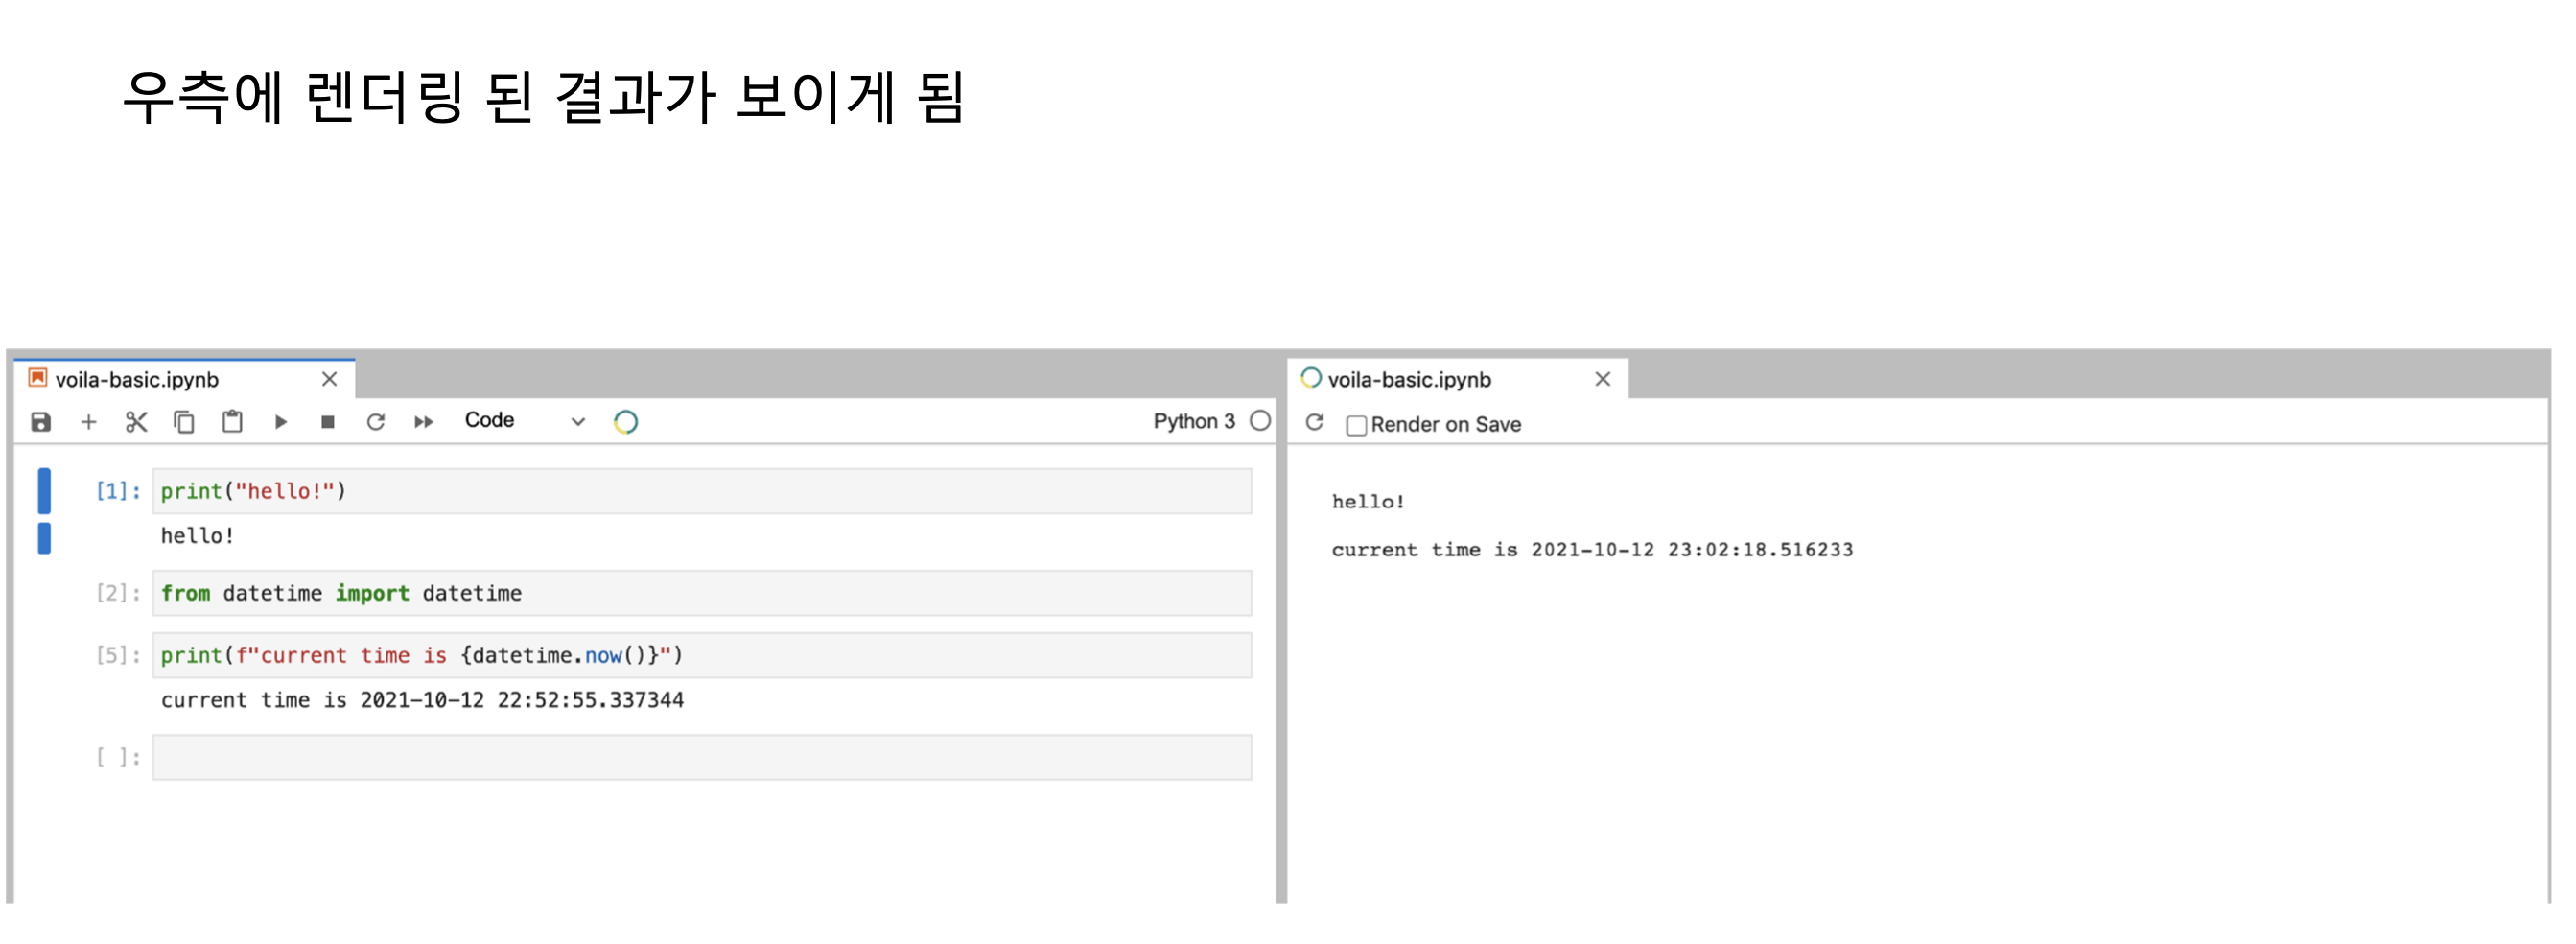
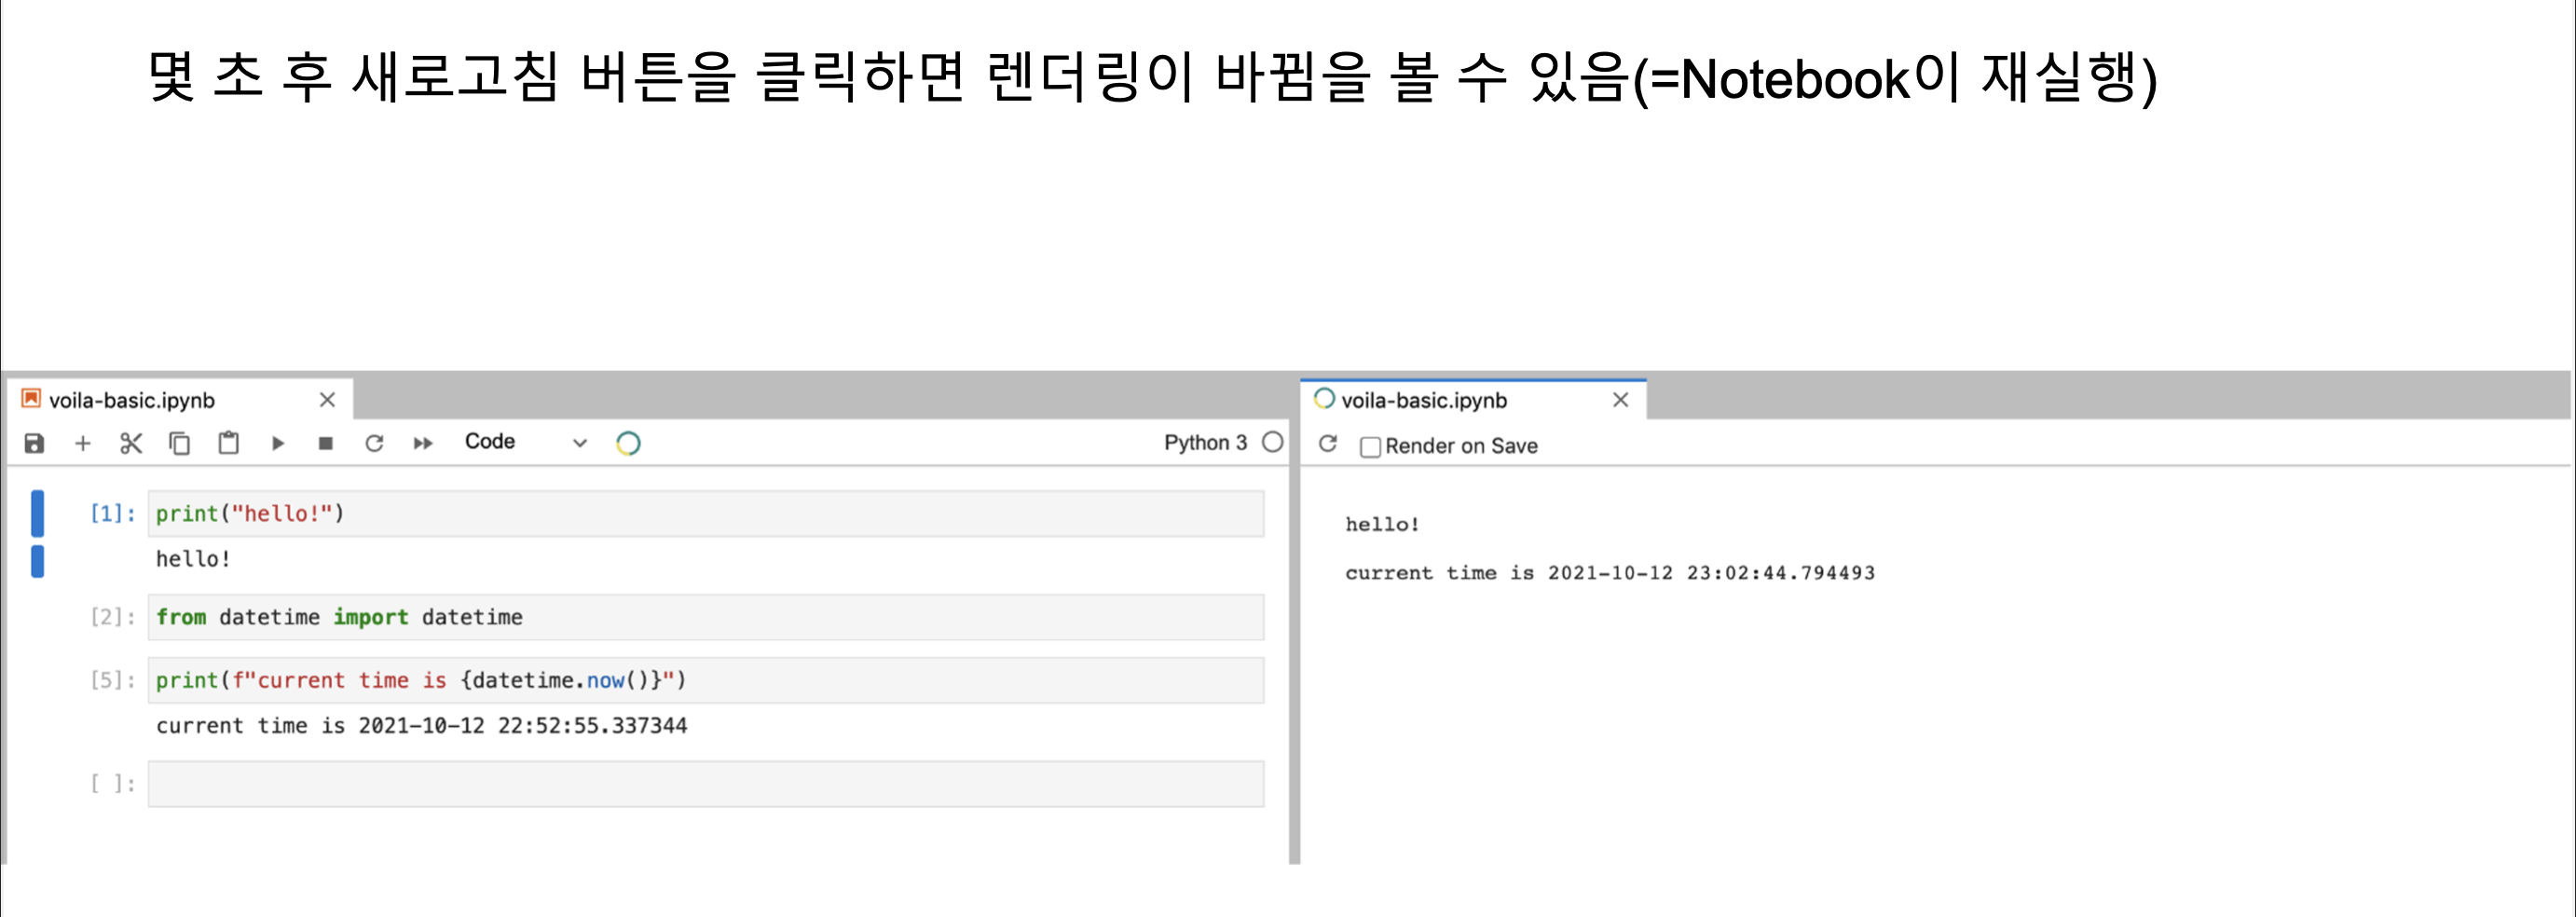
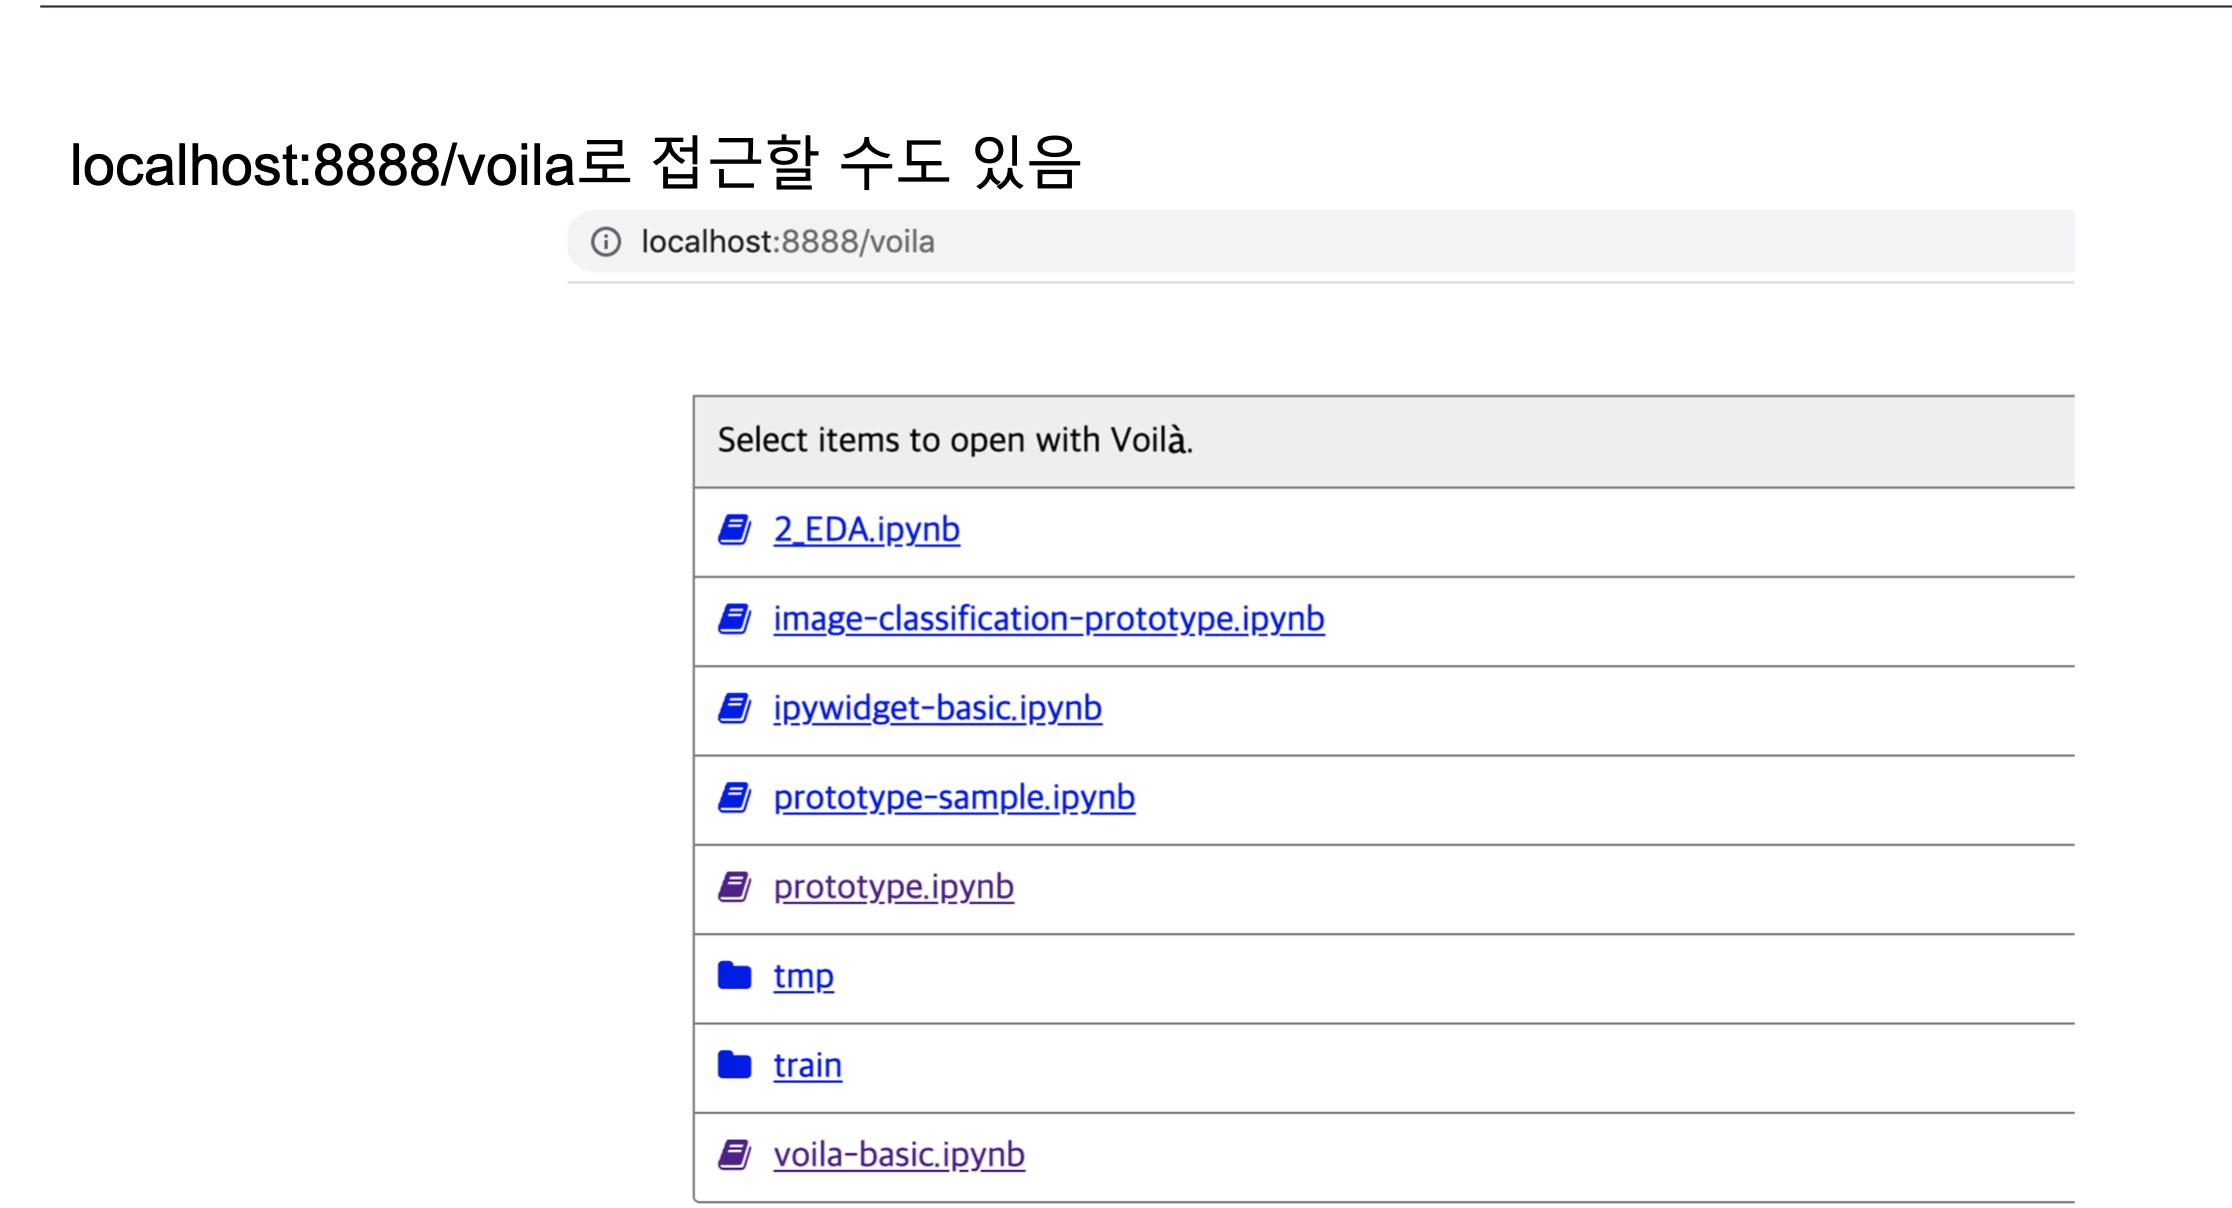
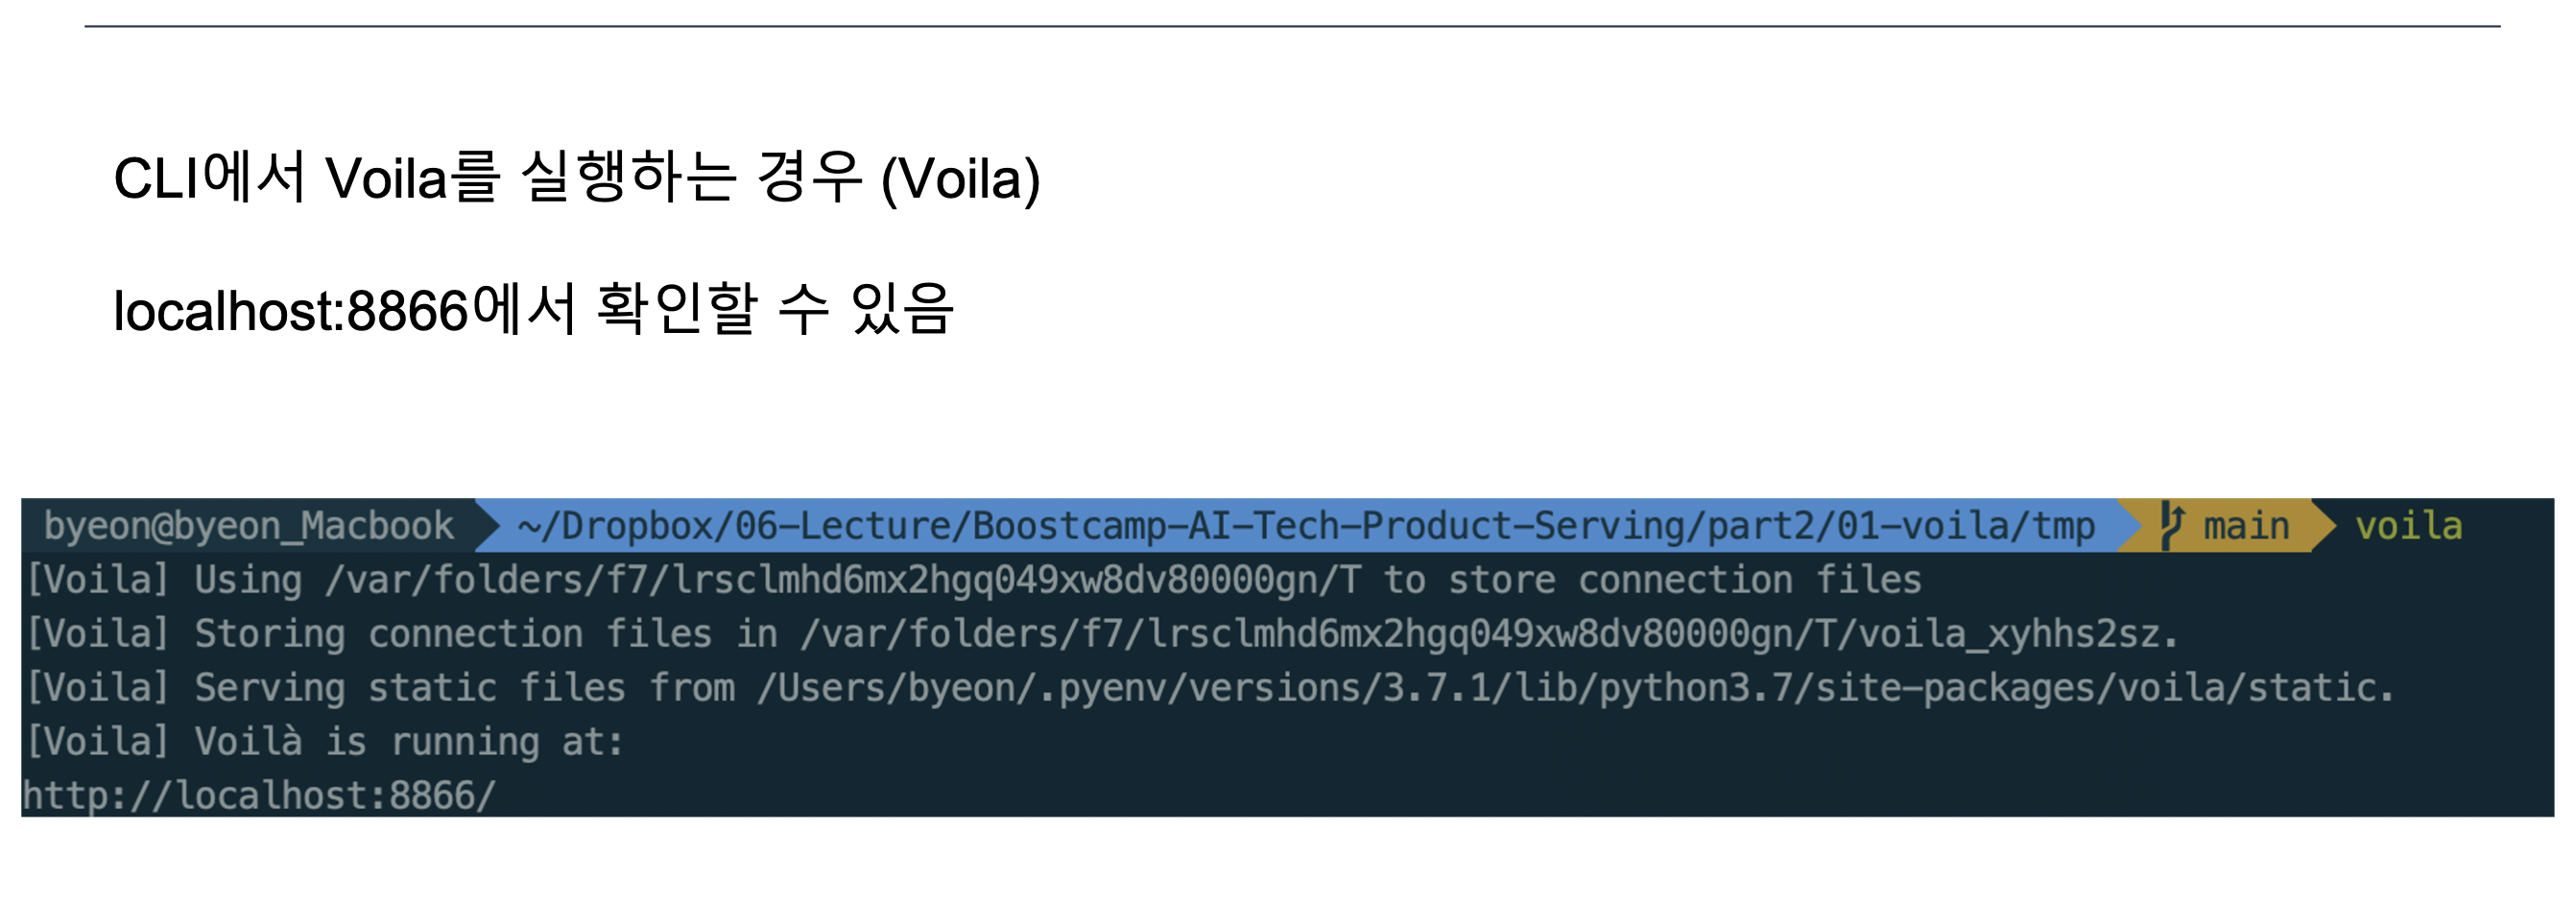
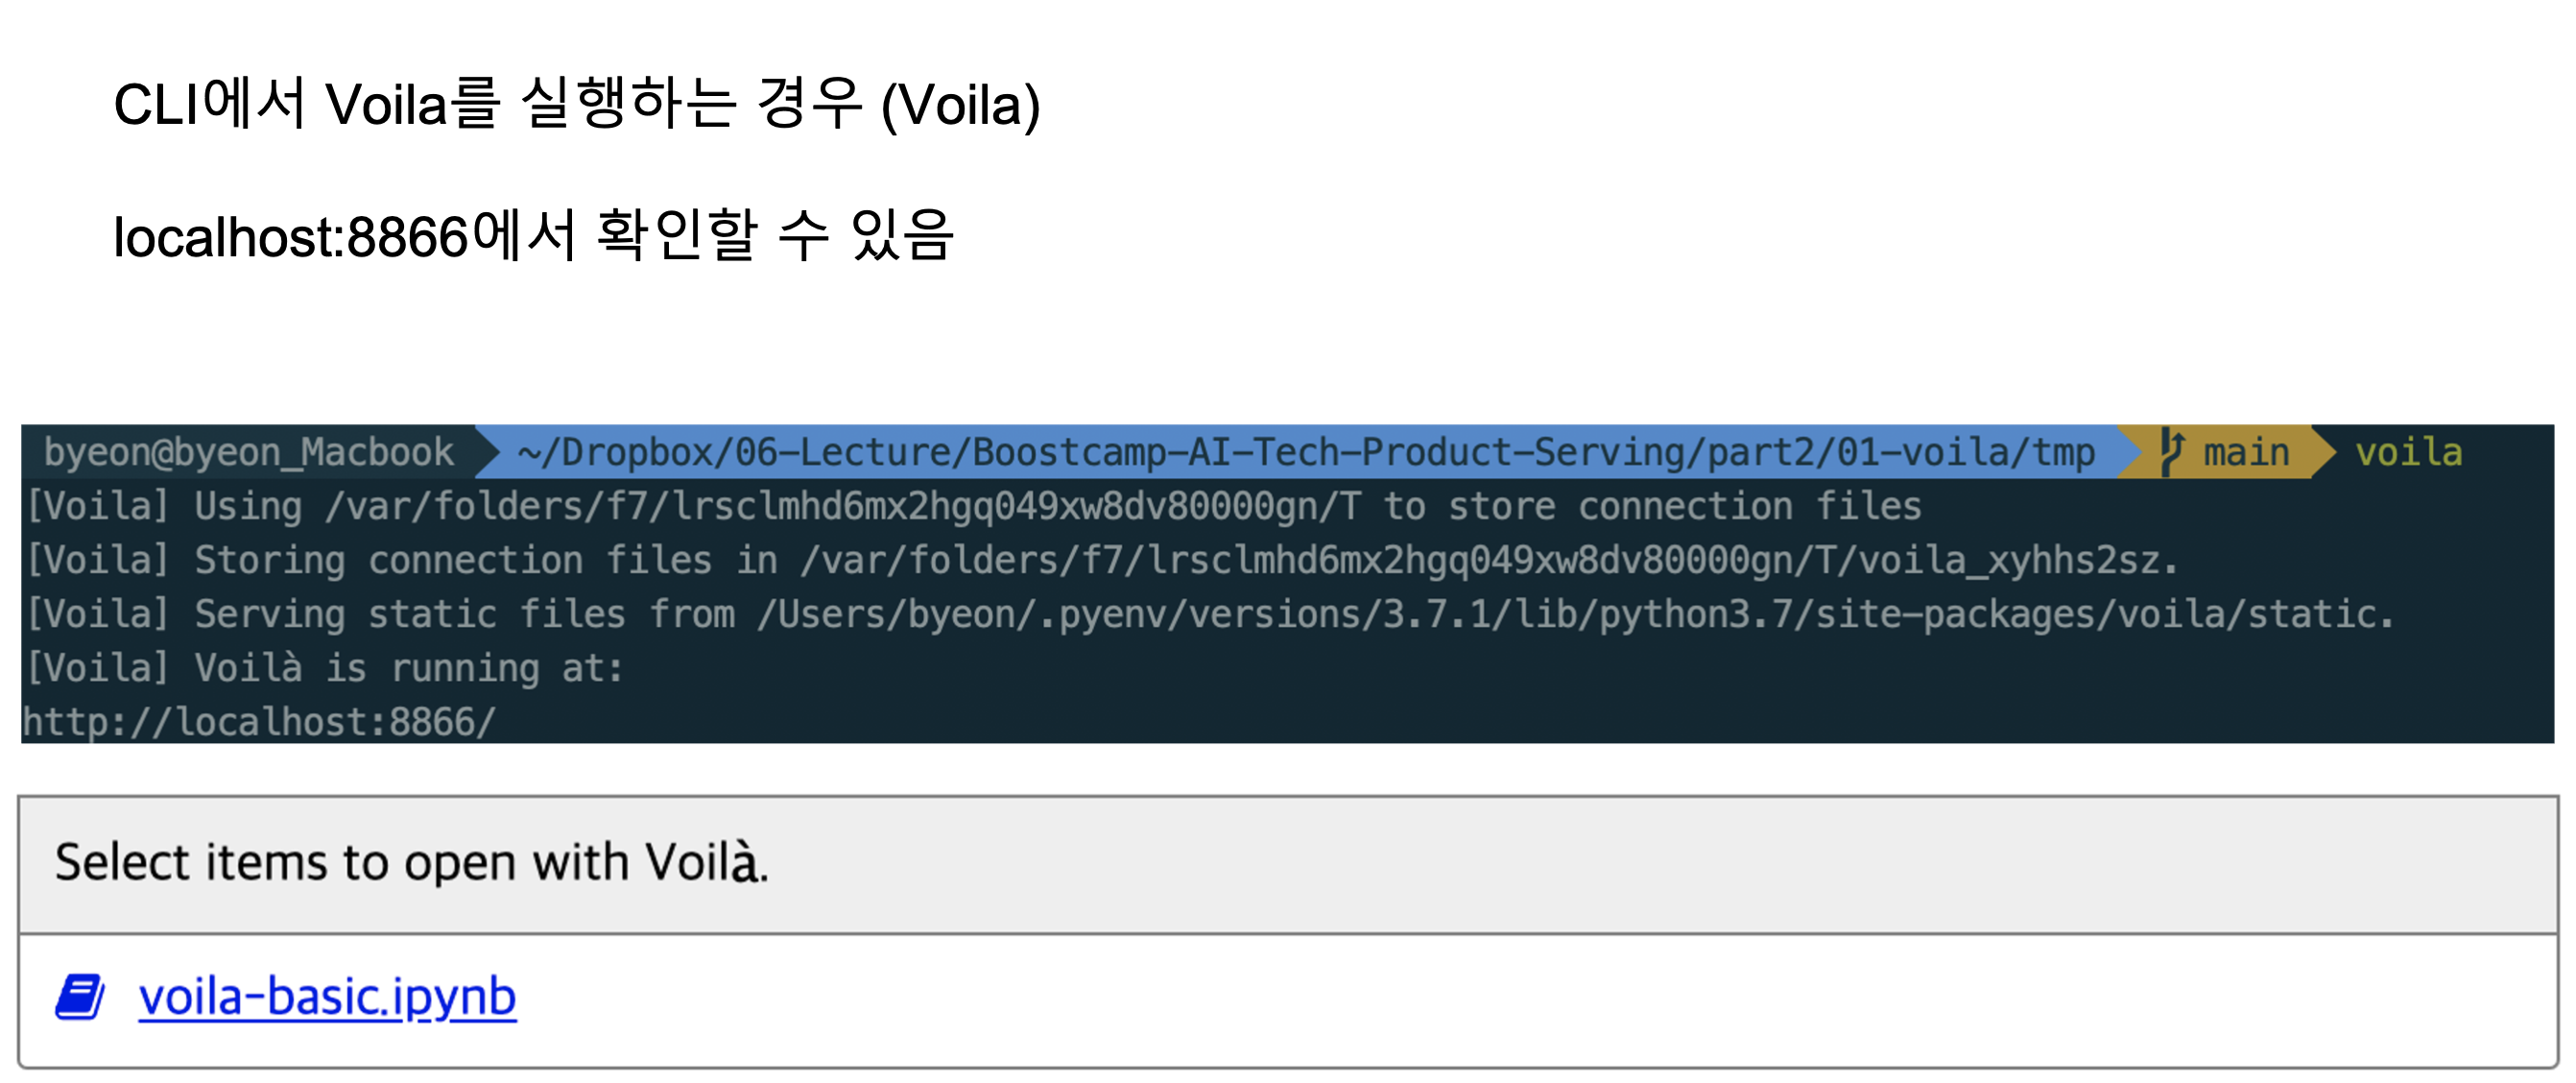
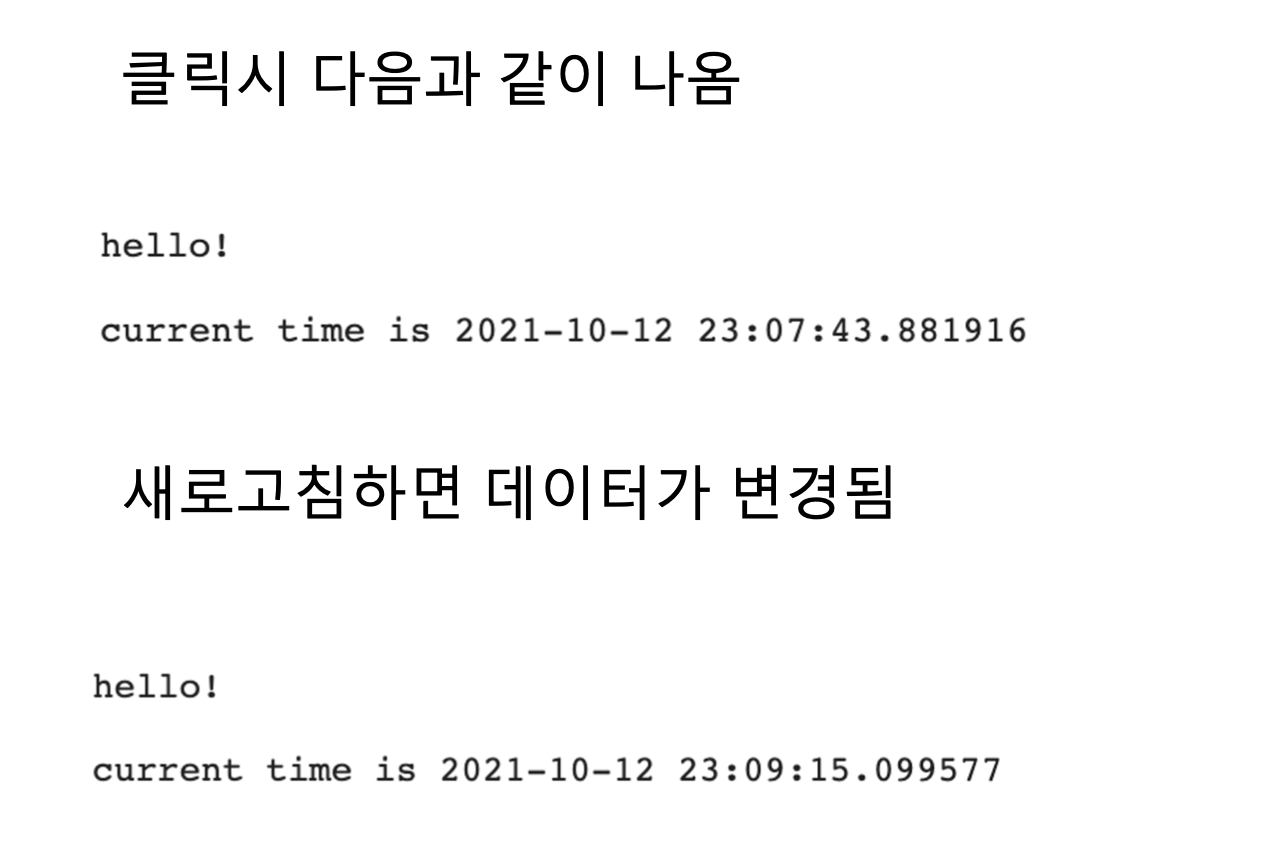
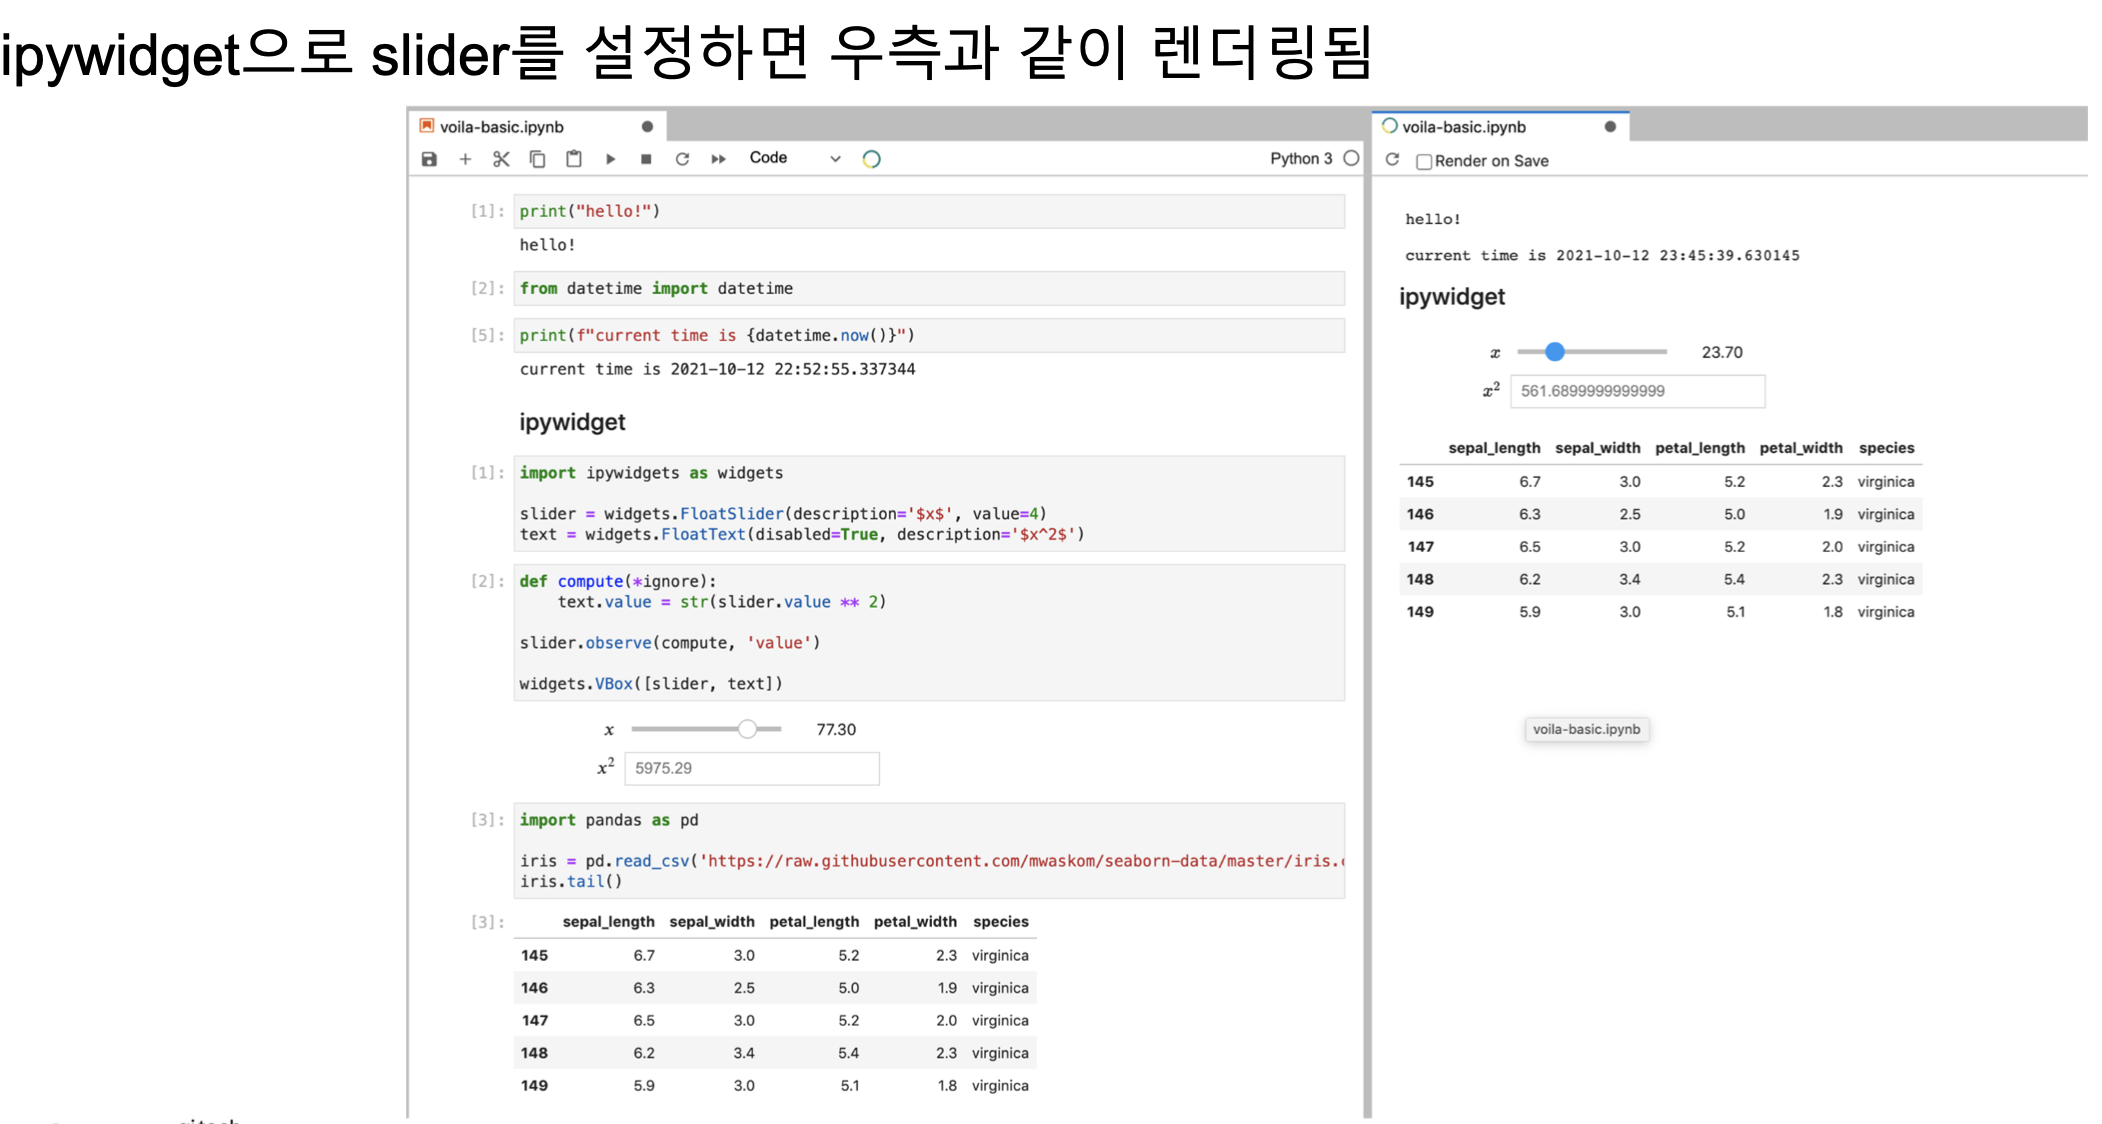
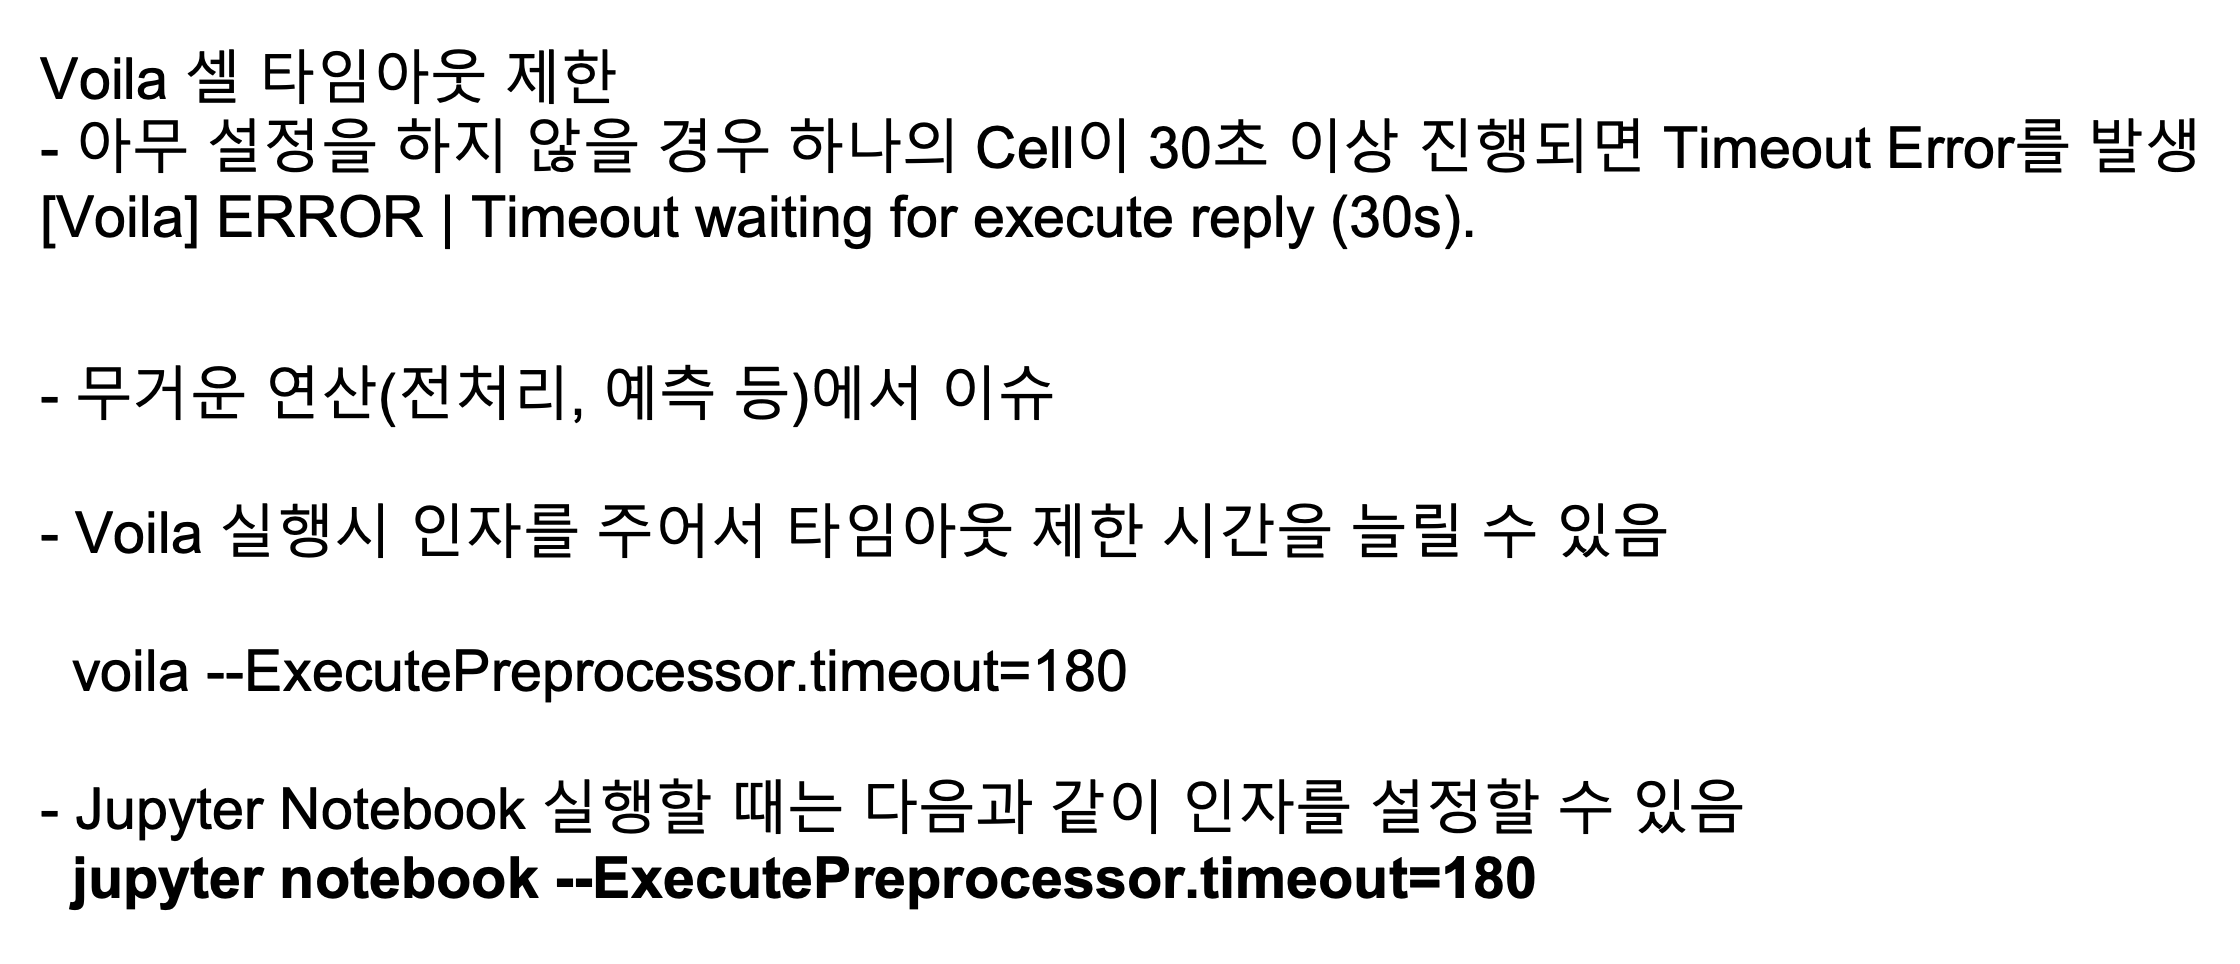
1.4.3 Voila Tip
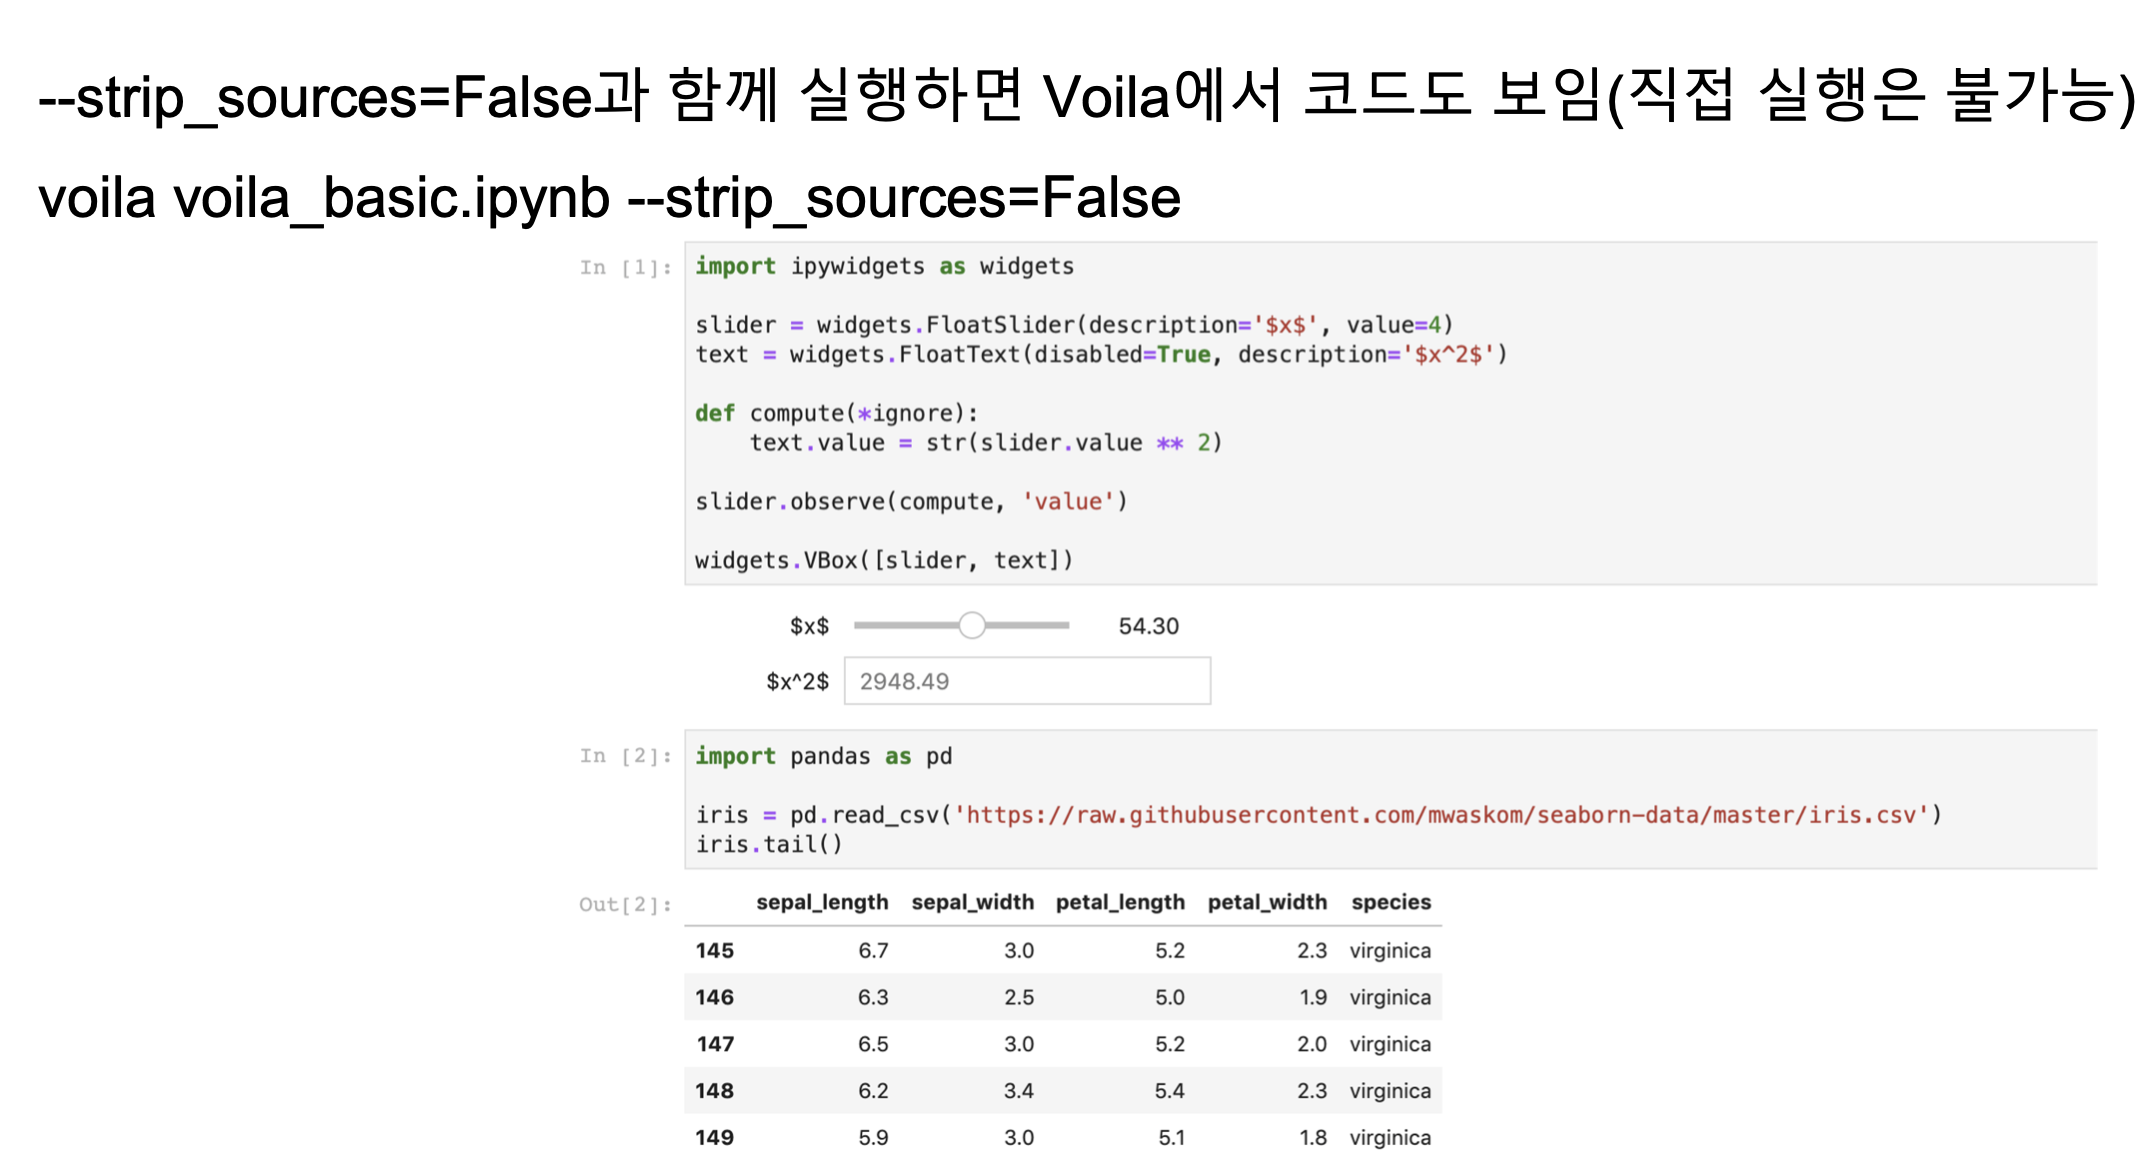
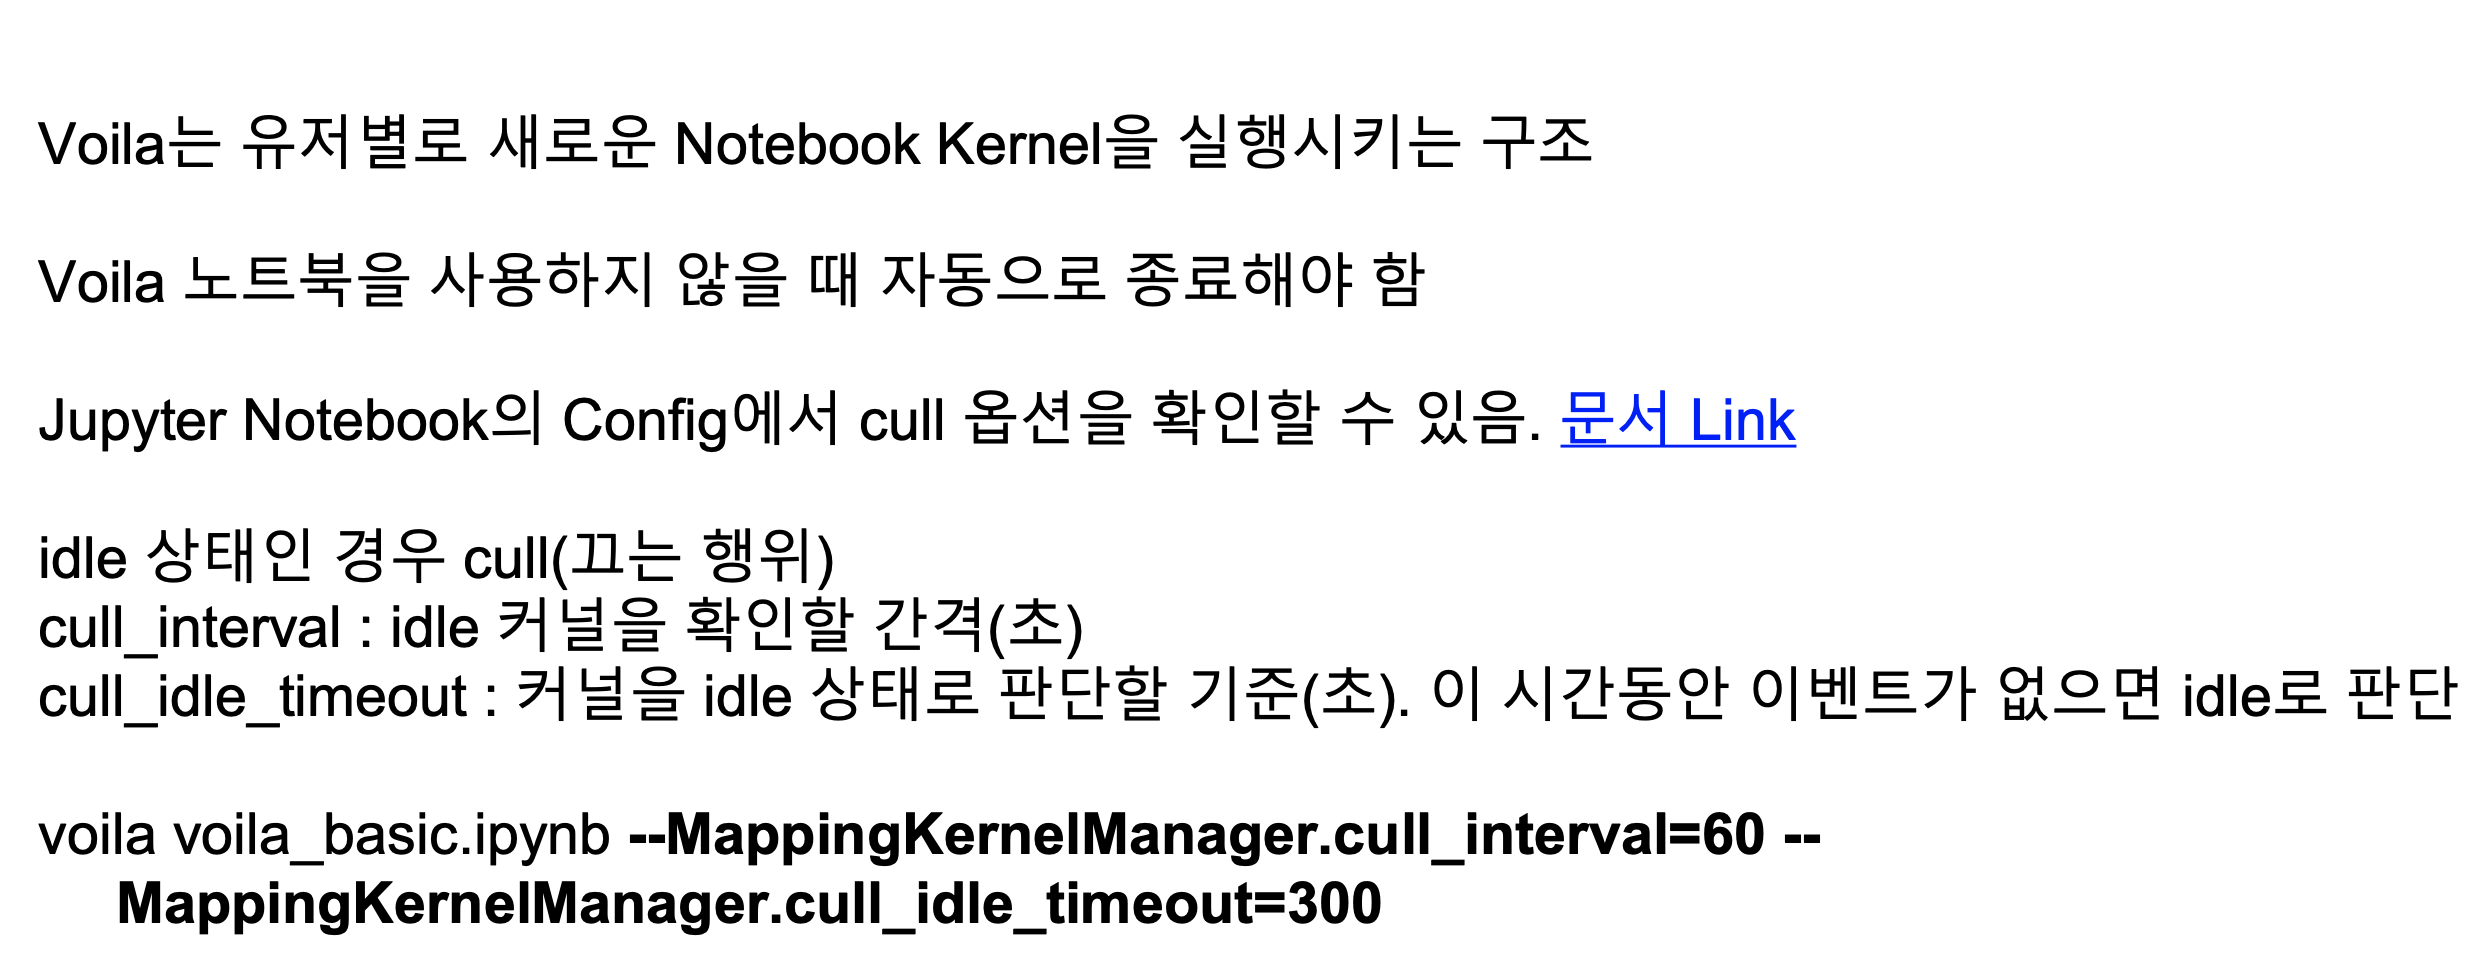

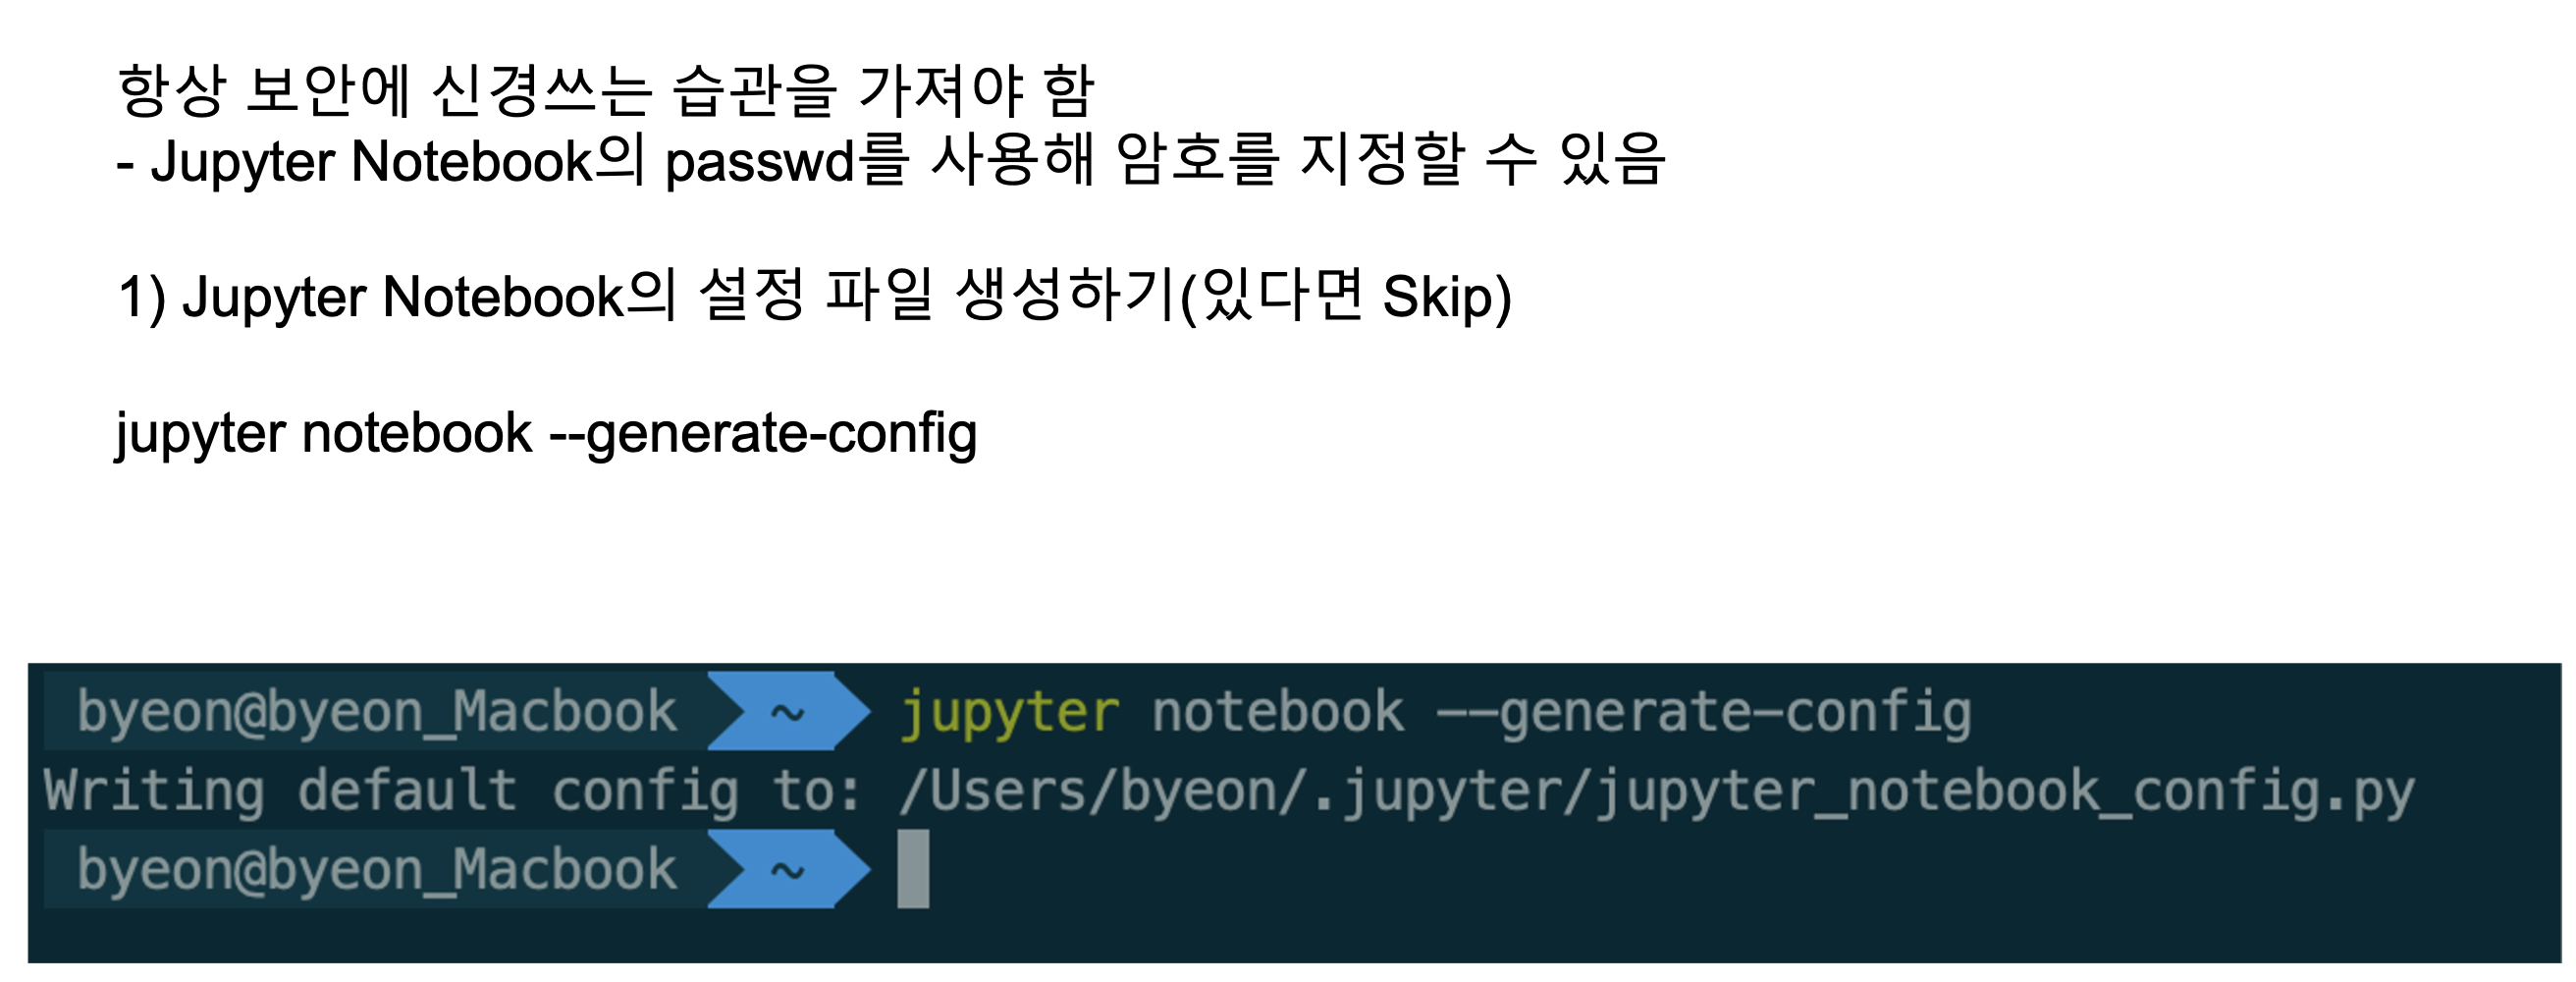
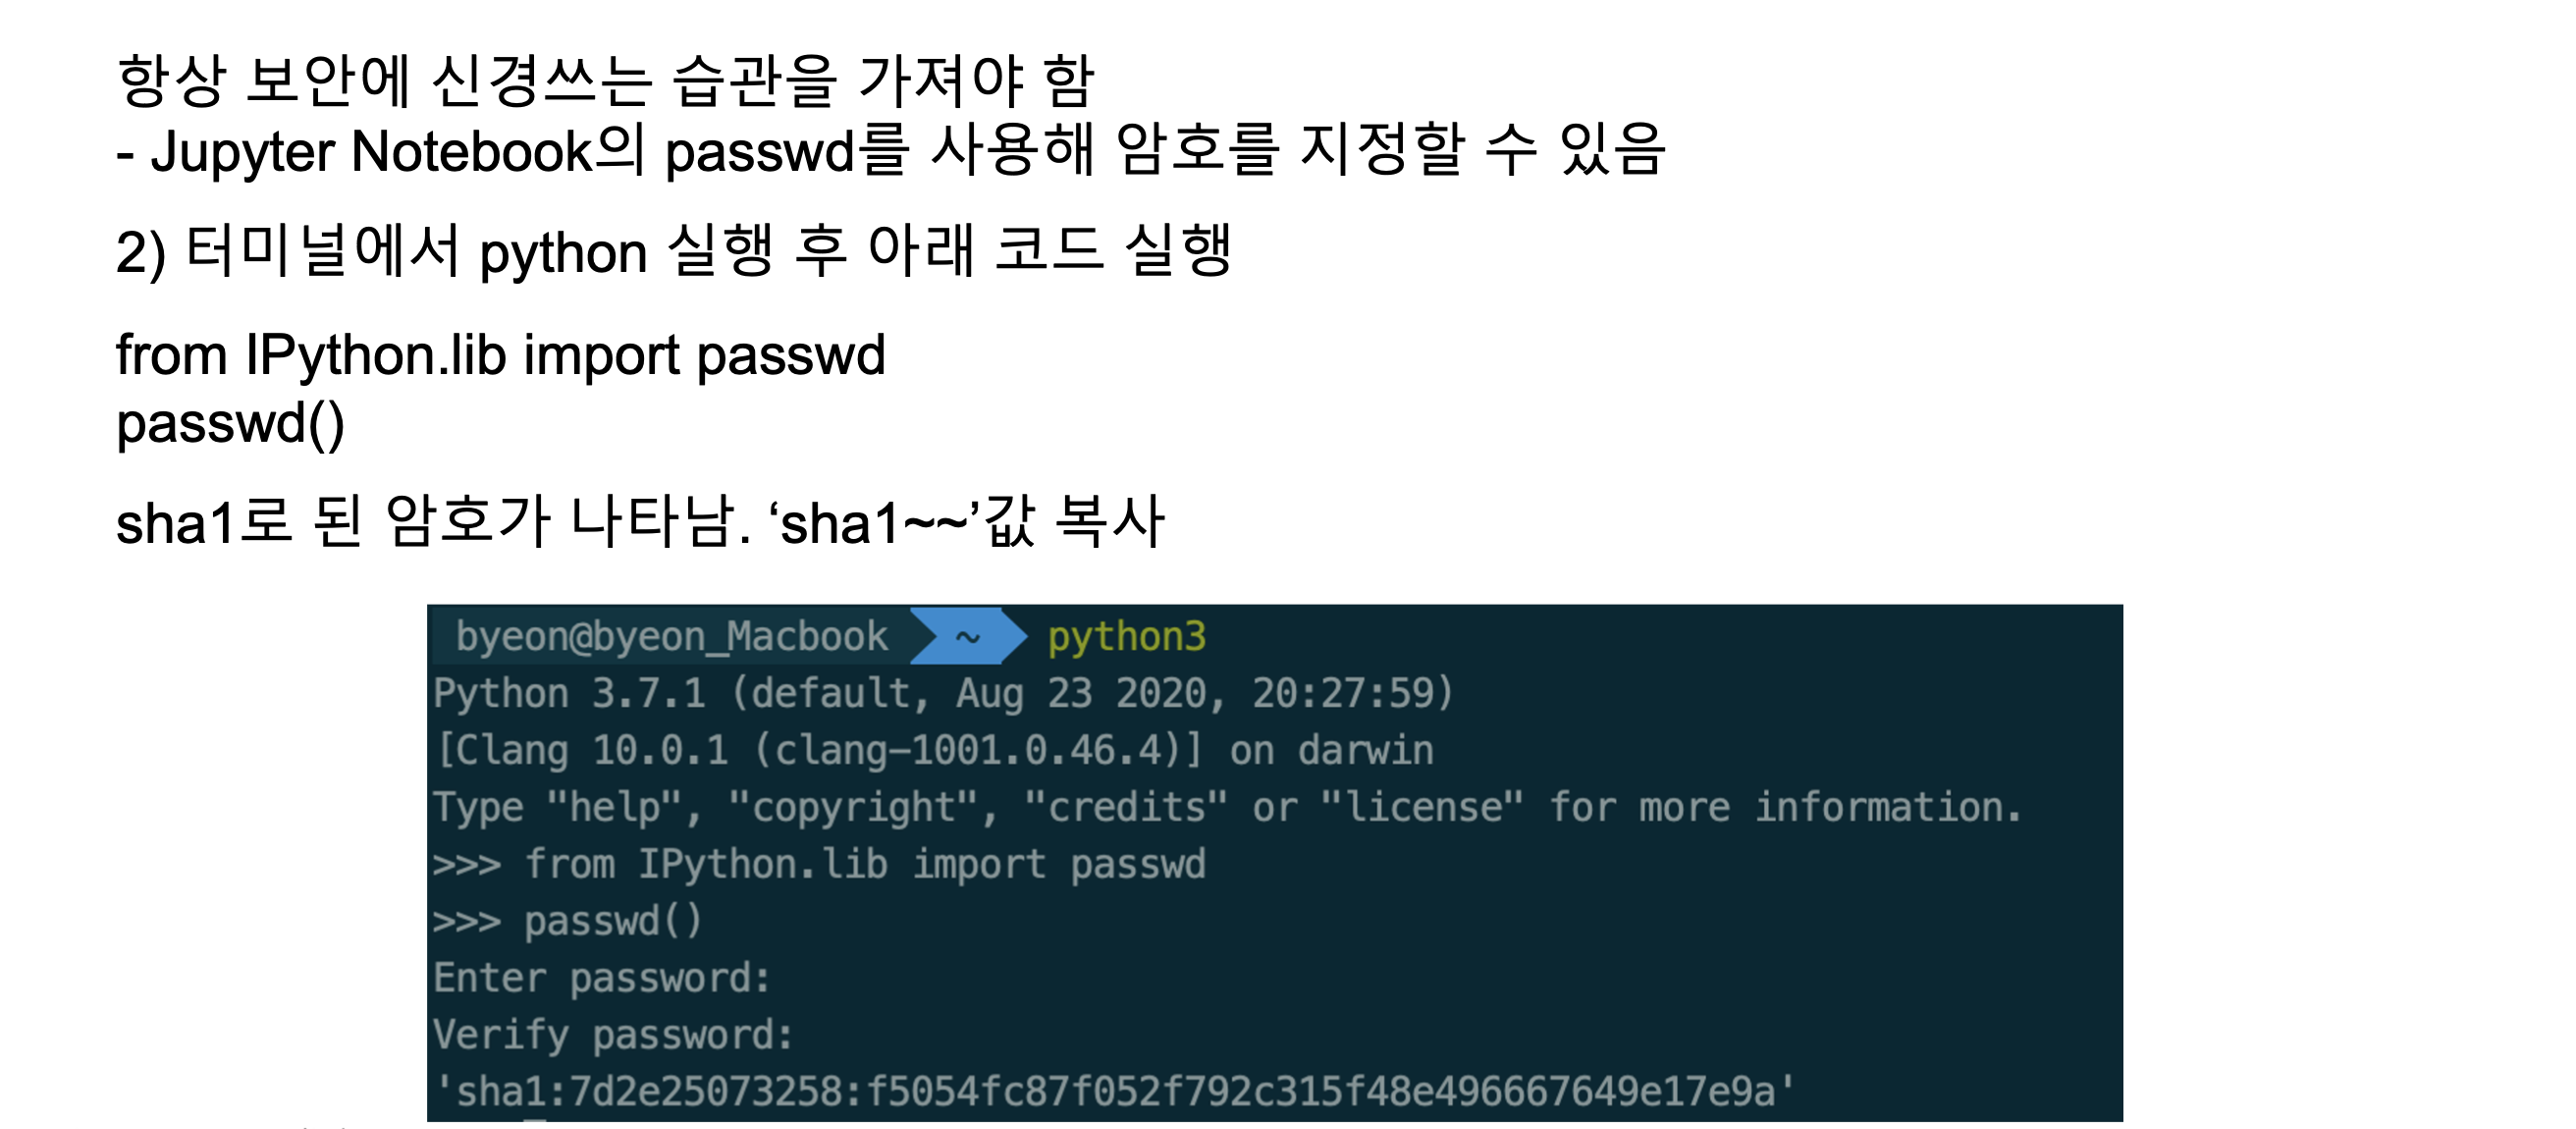
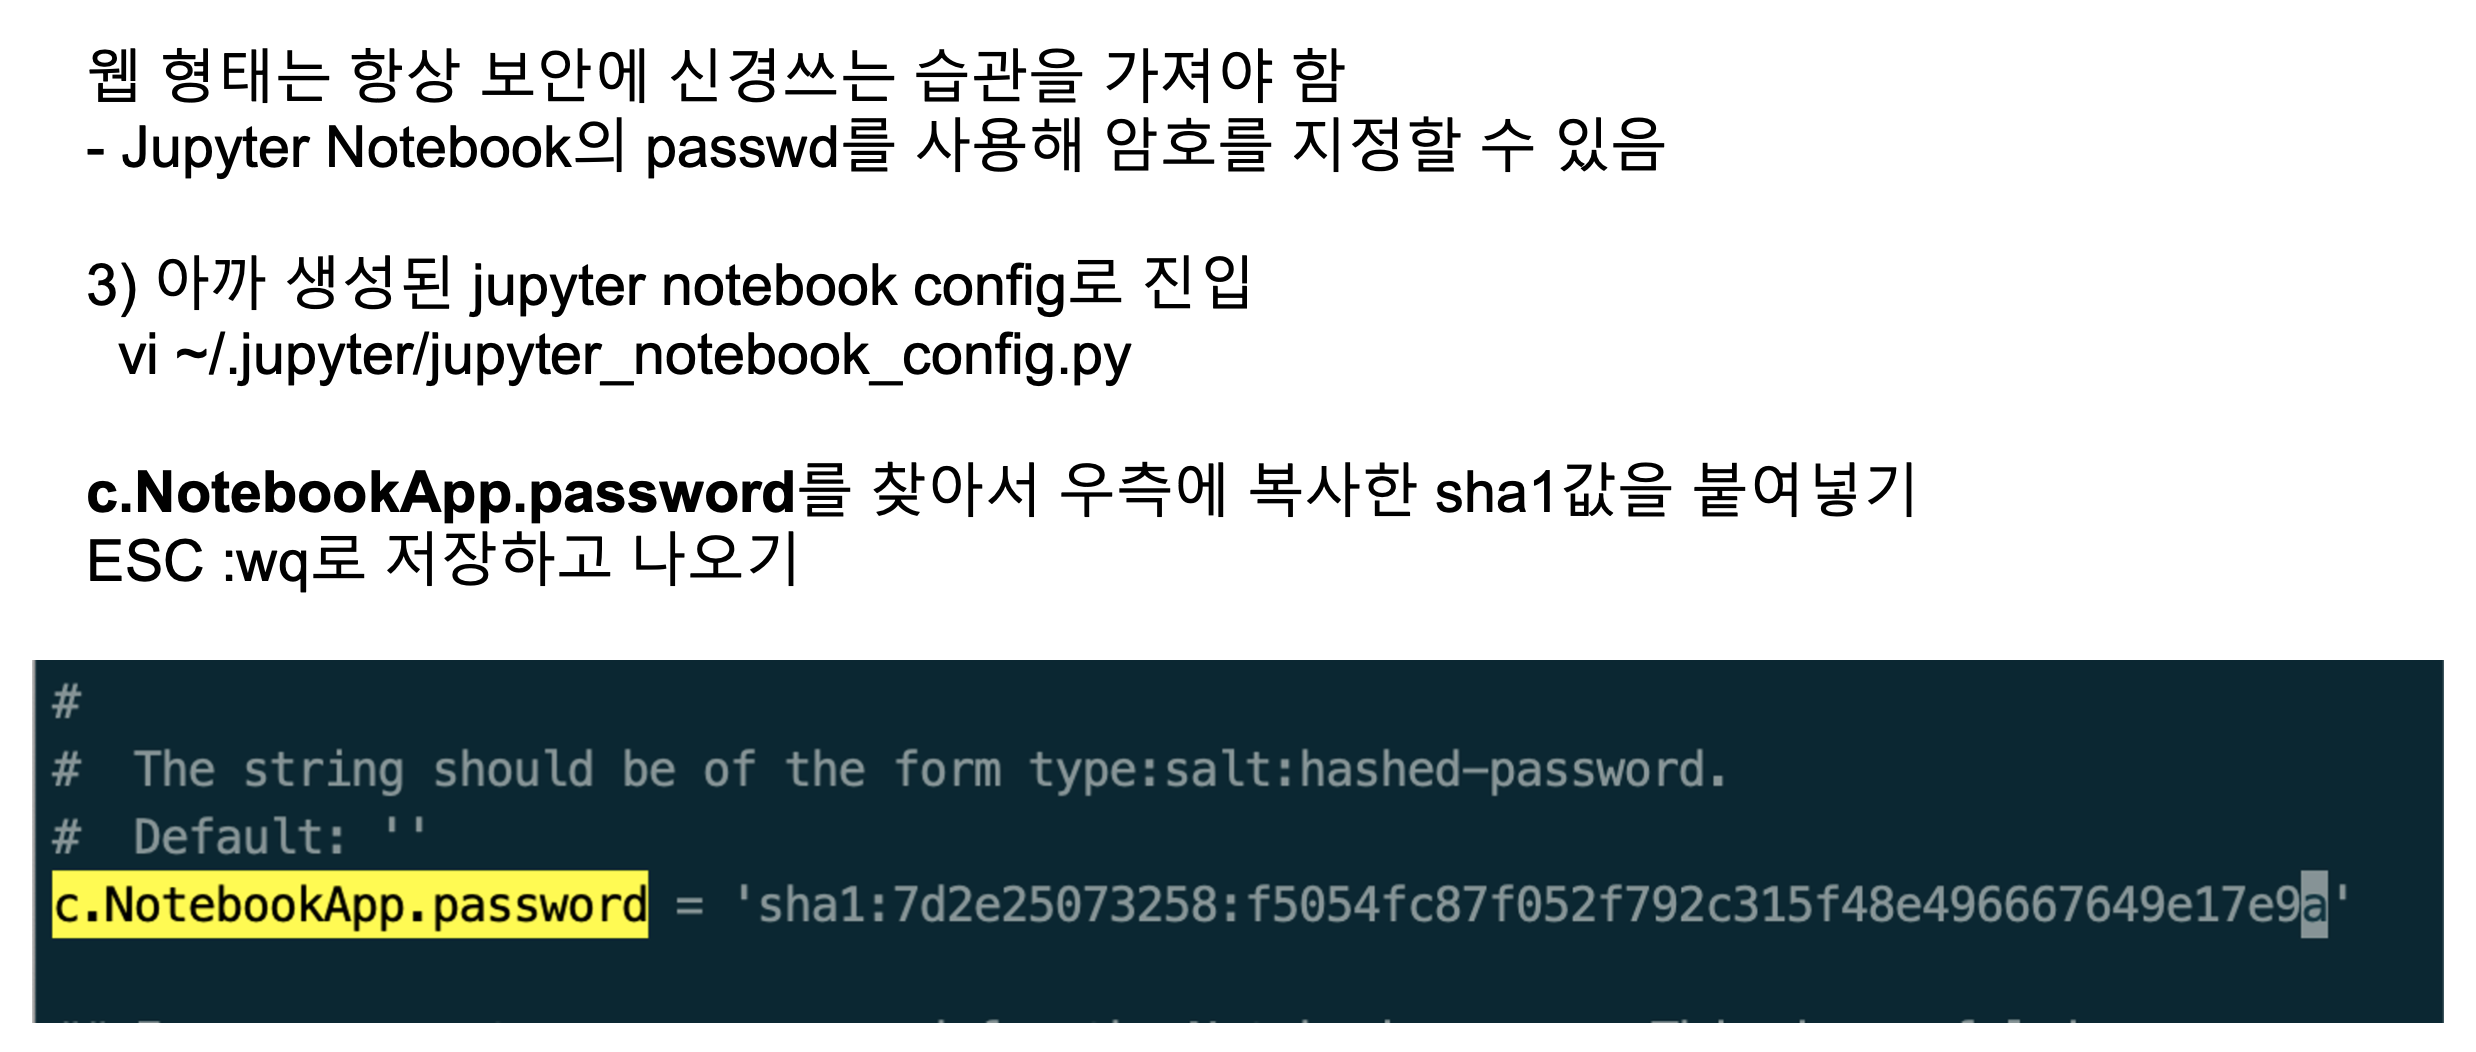
1.4.4 Voila 보안
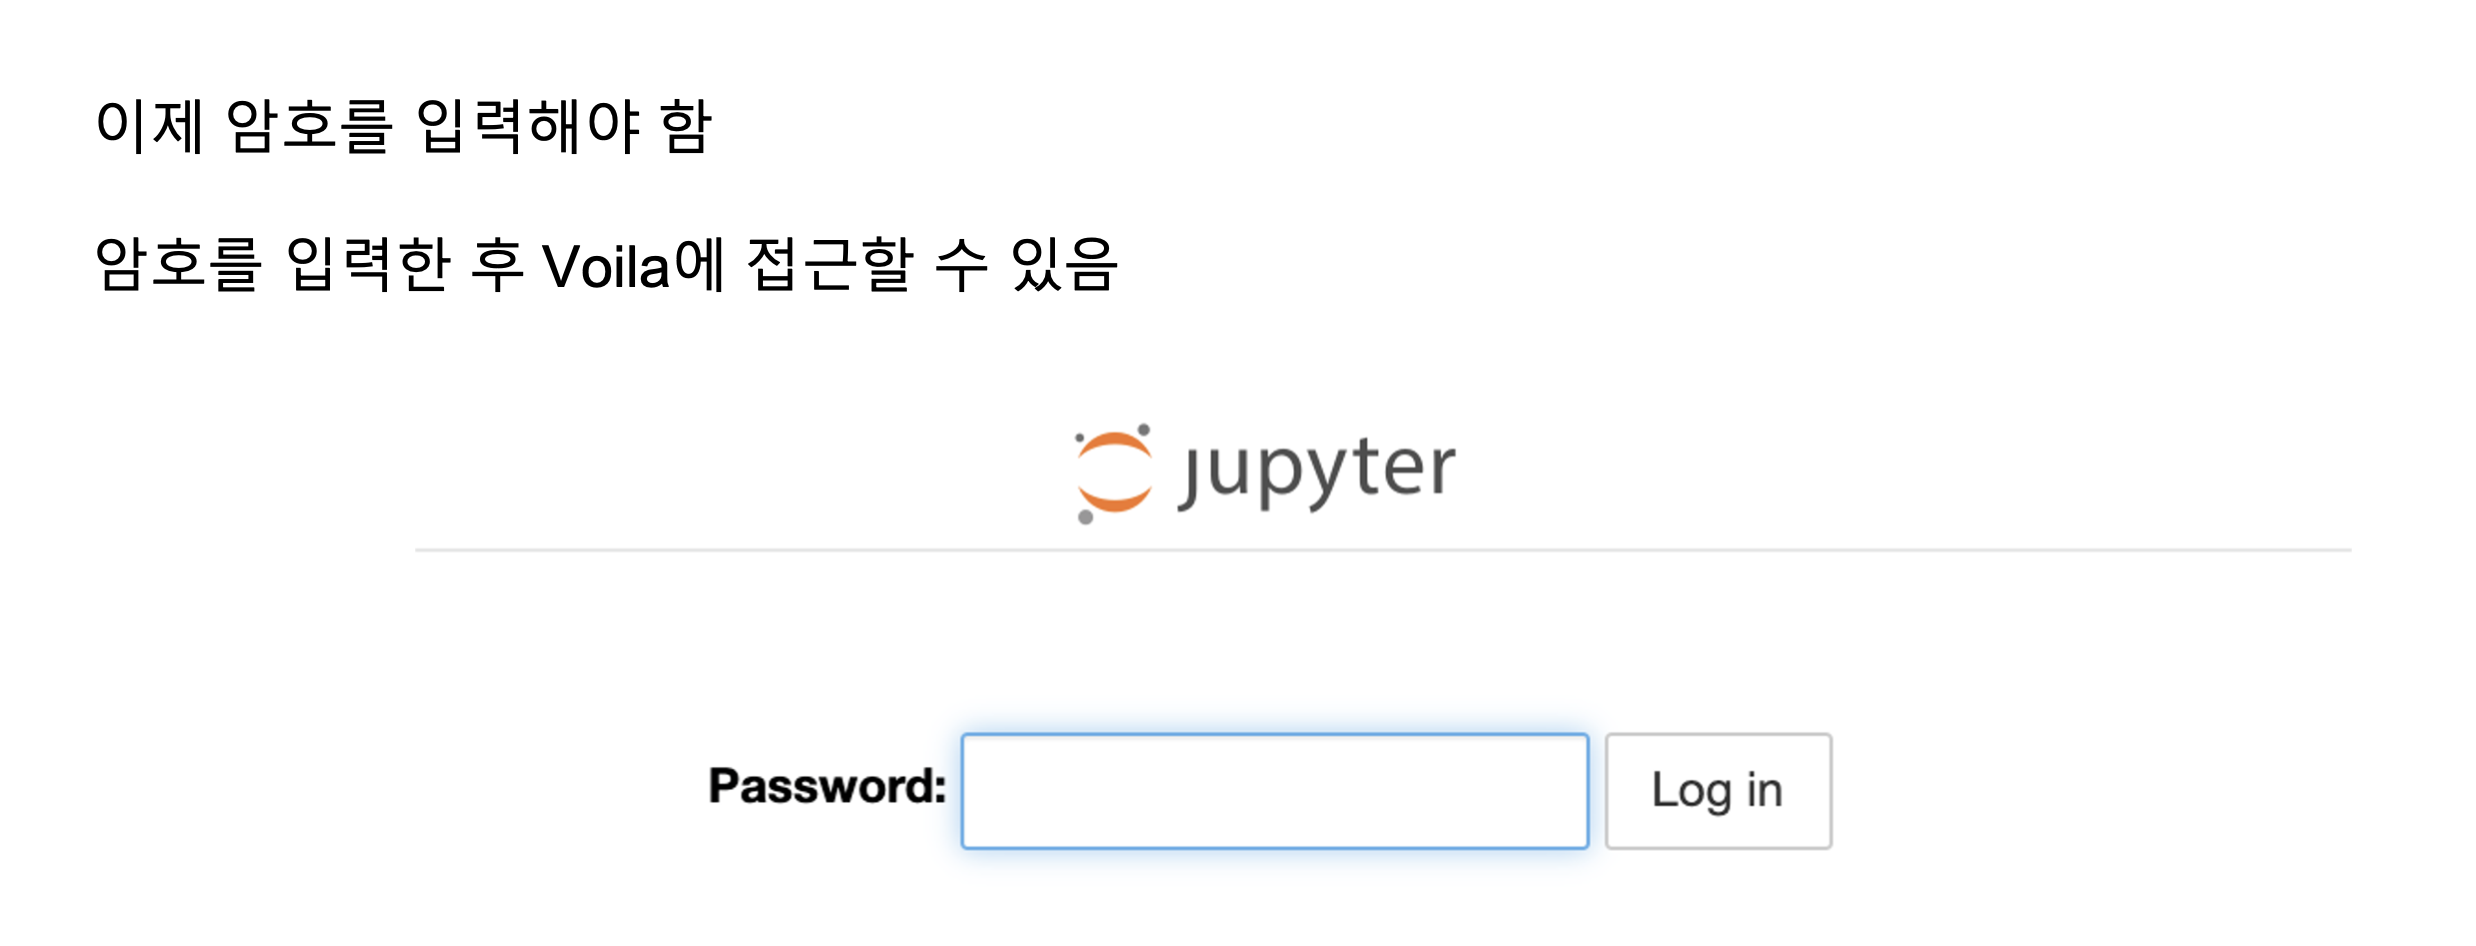
2. ipywidget
- ipywidget과 같이 사용하면 인터랙티브한 효과를 줄 수 있음
import ipywidgets as widgets# display : Python Object를 보여주는 함수 from IPython.display import display
2.1 ipywidget 사용법
2.1.1. Slider Widget
widgets.IntSlider()
int_slider = widgets.IntSlider()
display(int_slider)

widgetsIntSlider(
    value = 7, # default value
    max = 10,
    min = 0,
    step=1,
    orientation = 'vertical',
    description = 'value' # slider label
)

# FloatSlider, IntRangeSlider 등이 있음
2.1.2. Text Widget
# Bounded : 범위가 주어진 Text
widgets.BoundedIntText(
    value = 7,
    min = 0,
    max = 10,
    step = 1,
    description = 'Text',
    disabled = False
)
widgets.BoundedIntText(
    value = 7,
    description = 'Any',
    disabled = False
)

widgets.Text(
    value = 'Hello World',
    placeholder = 'Type something',
    description = 'String:'
)
widgets.Textarea(
    value = 'Hello World',
    placeholder = 'Type something',
    description = 'String:'
)
widgets.Password(
    value = 'password',
    placeholder = 'Enter password',
    description = 'Password:'
)
2.1.3. Boolean Widget
widgets.ToggleButton(
    value = False,
    description = 'Click me',
    button_stype = '', # 버튼 스타일 'succues', 'info', 'warning, 'danger', ''
    tooltip = 'Description',
    icon = 'check' # icon 모양
)

widgets.ToggleButton(
    value = False,
    description = 'Click me',
    button_stype = 'info', # 버튼 스타일
    tooltip = 'Description',
    icon = 'bath' # icon 모양
)

widgets.Checkbox(
    value = False,
    description = 'Click me',
    indent = False
)
2.1.4. Selection Widget
widgets.Dropdown(
    options = ['1','2','3'],
    value = '2',
    description = 'Number:'
    disabled=False
)

widgets.Dropdown(
    options = [('One',1) ('Two',2), ('Three',3)],
    value = 2,
    description = 'Number:'
)

widgets.RadioButtons(
    options = ['pepperoni','pineapple','anchovies'],
    description = 'Topping:'
)
2.1.5. Upload Widget
widgets.FileUpload(
    accept = '', # 허용할 확장자
    multiple=False
)

file = open("psyduck.png","rb)
image = file.read()
widgets.Image(
    value = image,
    format = 'png',
    width = 300,
    height = 400
)
2.1.6. Date Picker Widget
widgets.DatePicker(
    description='Pick a Date',
    disabled = False
)
2.1.7. Event Widget (on_click)
button = widgets.Button(description="Click Me!")
output = widgets.Output()
dispaly(button, output)

def on_button_clicked(button):
    with output:
        print("Hello world!")

button.on_click(on_button_clicked)
2.1.8. Event Widget (observe)
int_range = widgets.IntSlider()
output2 = widgets.Output()
dispaly(int_range, output2)

def on_value_change(change):
    with output2:
        print(change['new'])

int_range.observe(on_value_change, names = 'value')
2.1.9. interact Decorator
from ipywidgets import interact

@interact(x=True, y=1.0)
def g(x,y):
    return (x,y)
from ipywidgets import interact, fixed
@interact(x=True, y=1.0, z = fixed(10))
def g(x,y,z):
return (x,y,z) from ipywidgets import interact, fixed
@interact(x=True, y=1.0, z = 10)
def g(x,y,z):
return (x,y,z) 2.1.10. layout (Hbox, VBox)
slider = widgets.IntSlider(description = "$x$", value = 1)
widgets.VBOX([slider])
slider = widgets.IntSlider(description = "$x$", value = 1)
slider2 = widgets.FloatSlider(description = "$y$", value = 2.0)
widgets.VBOX([slider, slider2])from ipywidgets import Botton, HBox, VBox
words = ['correct','horse','battery','staple']
items = [Button(description = w) for w in words]
left_box = VBox([items[0], items[1]])
right_box = VBox([items[2], items[3]])
HBox([left_box, right_box])slider = widgets.FloatSlider(description="$x$", value=4)
text = widgets.FloatText(disabled=True, description="$x^2$")
def compute(*ignore):
text.value = str(slider.value ** 2)
slider.observe(compute, 'value')
widgets.VBox([slider, text])2.2 ipywidget + Voila
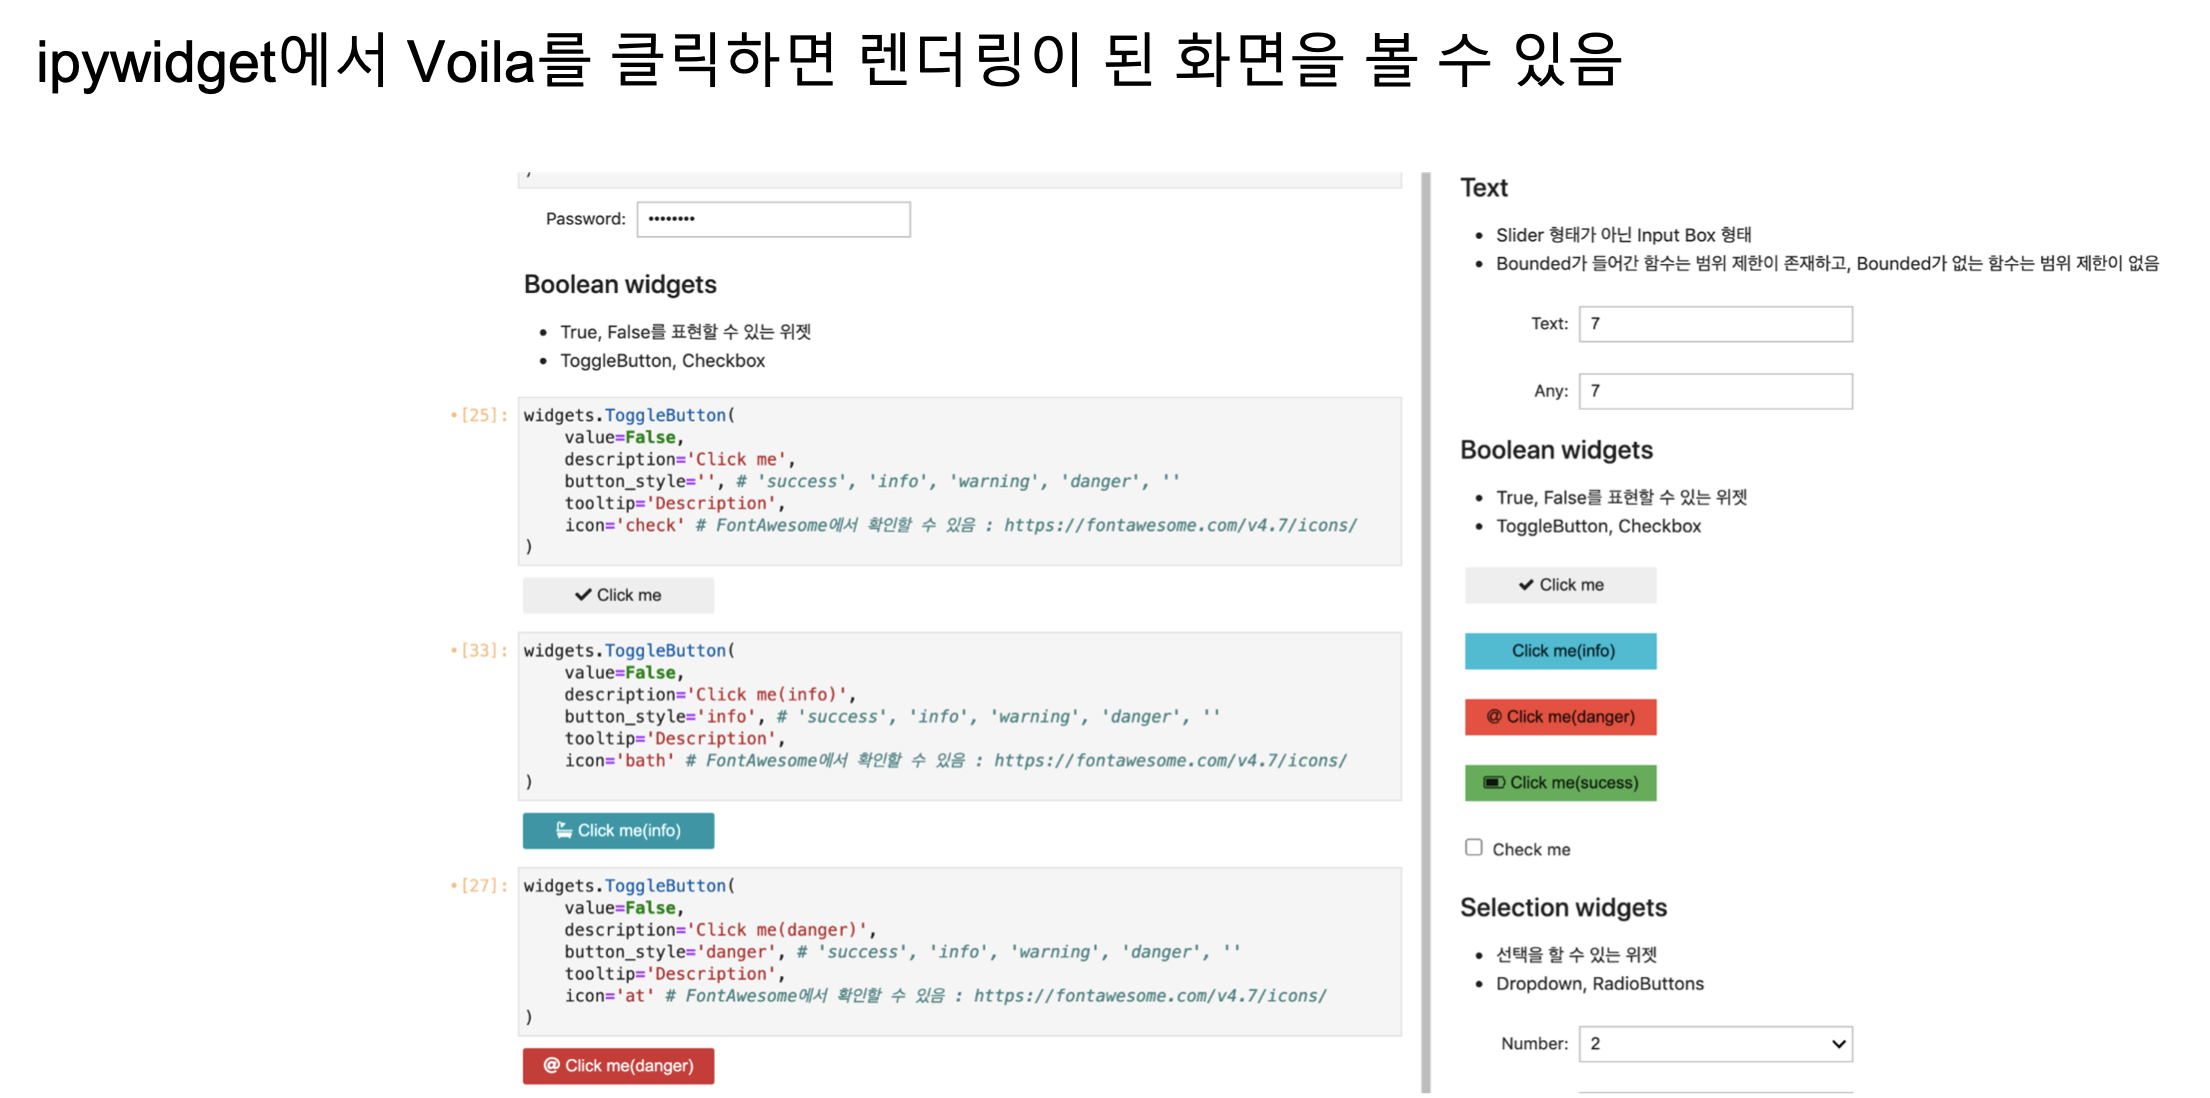
- ipywidget에서 Voila를 클릭하면 렌더링이 된 화면을 볼 수 있음
'MLOps' 카테고리의 다른 글
| MLOps - 6. Streamlit (0) | 2022.05.22 |
|---|---|
| MLOps - 5. Voila, ipywidget (0) | 2022.05.21 |
| MLOps - 3. 머신러닝 프로젝트 라이프 사이클 (0) | 2022.05.19 |
| MLOps - 2. Model Serving (0) | 2022.05.18 |
| MLOps - 1. MLOps 개론 (0) | 2022.05.17 |


댓글